Android tutorial - Create Different Folders for Adding Different Resolution Images in Android Studio | image resolution - android studio tutorial
What is Resolution Images?
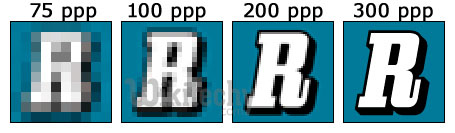
- Resolution refers to the number of pixels in an image.
- Resolution is sometimes identified by the width and height of the image as well as the total number of pixels in the image.
- For example, an image that is 2048 pixels wide and 1536 pixels high (2048X1536) contains (multiply) 3,145,728 pixels (or 3.1 Megapixels).
- Android support a wide range of devices and if you want to create an application in android then your application must be compatible with the different mobile devices.
- For supporting the different screen sizes, you must have different size images which you will save in various folders.
- Usually Android has four folder which covers almost every device, drawable-ldpi, drawable-mdpi, drawable-hdpi, drawable-xhdpi.
Background Images Dimensions for these different folders are as follows:
- ldpi = 240×320 pixels
- mdpi = 320×480 pixels
- hdpi = 480×800 pixels
- xhdpi = 720×1280 pixels
How to Add/Create different folders for adding different resolution Images in Android Studio:
- Step 1:
- First of all, you must have different images for these folder with given resolution.
- You can get the images in different resolutions through 9-Patches or you can use any high-end image editor tool like Adobe Photoshop.
- Step 2:
- Once you have all the images with you, now it’s time to create the folders for images.
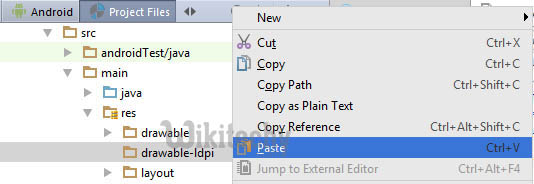
- Navigate to Project View in Android Studio
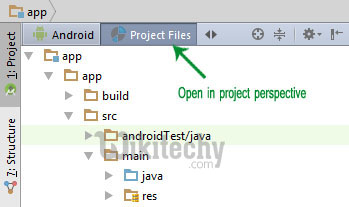
- Step 3: Go to App folder src > main > res folder.
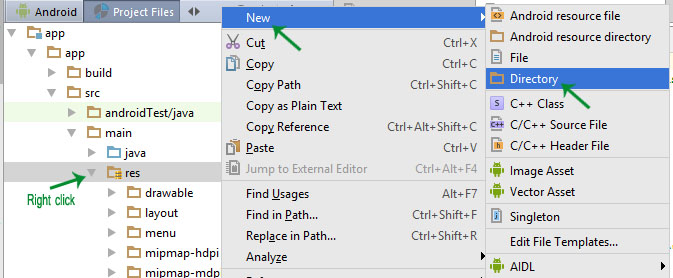
- Step 4:
- Right click on res folder.
- Select New and then click Directory.
- Step 5:
- Enter the name of your directory for example: drawable-ldpi.
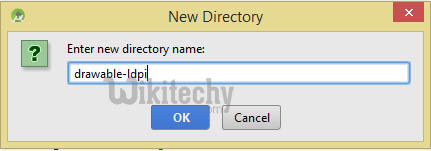
- Step 6:
- Now you have”drawable-lpdi” folder inside res folder.
- You can create rest of the folder “drawable-mdpi”,” drawable-hdpi” and “drawable-xhdpi”.
- Step 7:
- You can paste the different resolution images inside respective different folders.
Important Note:
- While pasting images to different resolution folder, keep one thing in mind all the images should have common name.
- For example: inside drawable-hdpi >image.png then drawable-xhdpi >image.png.
- That means name of the images is same but every image has different resolution.
- So in this way you just have to write android:background:@drawable/image and android will automatically adjust the image as per different mobile resolution.