Android tutorial - Android Installation - android app development - android studio - android development tutorial
- Android supports java, c++, c# etc. language to develop android applications.
- Java is the officially supported language for android.
- All the android examples of this site are developed using Java language and Eclipse IDE.
- Here, we are going to tell you, the required softwares to develop android applications using Eclipse IDE.

- By ADT Bundle
- By Setup Eclipse Manually
By ADT Bundle:
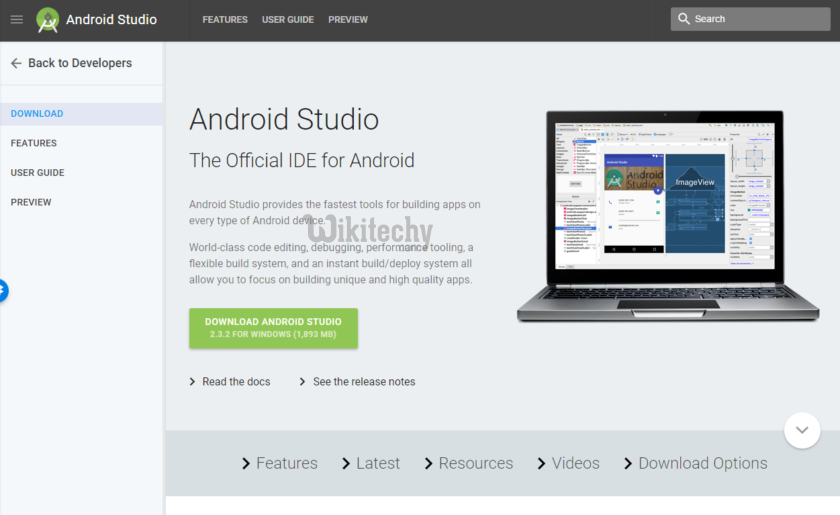
- Setting up Android Studio is fairly straightforward and is easier than ever thanks to nearly everything being bundled into one installer.
- Download Android Studio from the below URL https://developer.android.com/ and you’ll get not only Android Studio but also the Android SDK, the SDK manager and more.
- Install Java Development Kit, which you can download from the below URL, http://www.oracle.com/ Remember, Android Studio is only really your window into Java! Note: Android Studio and the SDK are rather large, so make sure you have some space free on your C:\ drive before you get started.
- Follow the simple instructions during installation and it should also set you up with an Android platform that you will be able to develop with as well.
- Be sure to tick the checkbox to tell the installer that you want the Android SDK as well and make a note of where Android Studio itself and the SDK are being installed. These are the defaults that it selects in installation:
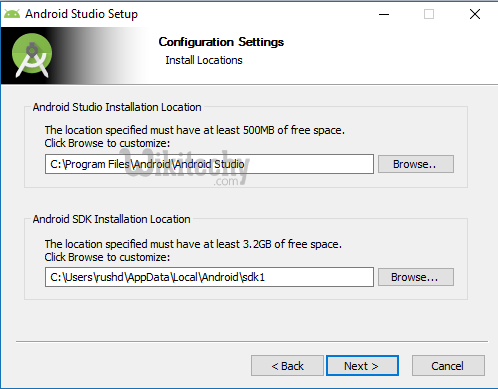
- Pick a directory for the SDK that has no spaces in it. Note that the AppData folder that Android Studio has selected here is a hidden folder in Windows.
- That means you’ll need to select ‘Show Hidden Folders’ if you want to browse to it using the explorer.
Setup Android for Eclipse IDE
Below is the list of software required to setup android for eclipse IDE manually.
- Install the JDK
- Download and install the Eclipse for developing android application
- Download and Install the android SDK
- Intall the ADT plugin for eclipse
- Configure the ADT plugin
- Create the AVD
- Create the hello android application
1) Install the Java Development Kit (JDK)
- For creating android application, JDK must be installed if you are developing the android application with Java language. Below is the link,
http://www.oracle.com/technetwork/java/javase/downloads/index.html
2) Download and install the Eclipse IDE
- For developing the android application using Eclipse IDE, you need to install the Eclipse. you can download it from the below location
http://www.eclipse.org/downloads/
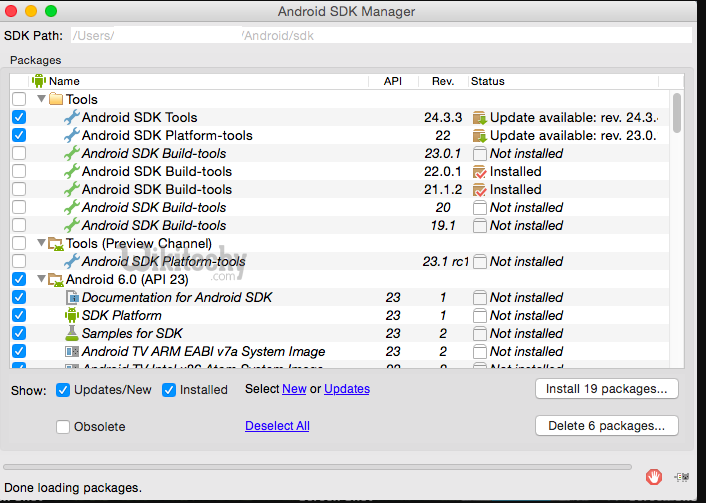
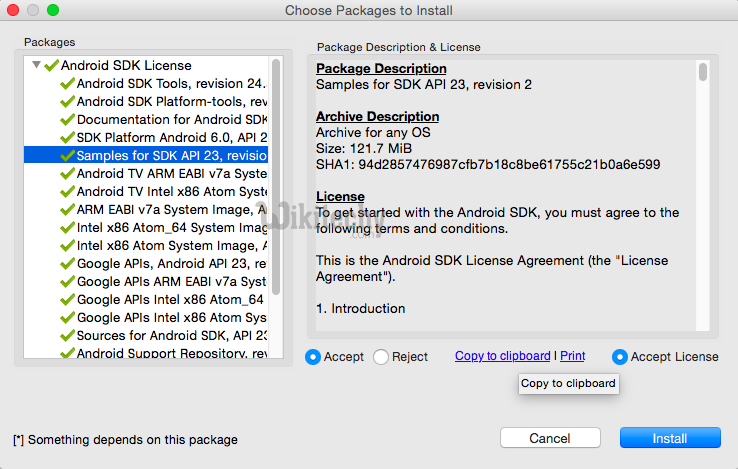
3) Download and install the android SDK
- URL for the download is https://developer.android.com/studio/index.html
- Now double click on the exe file, it will be installed.
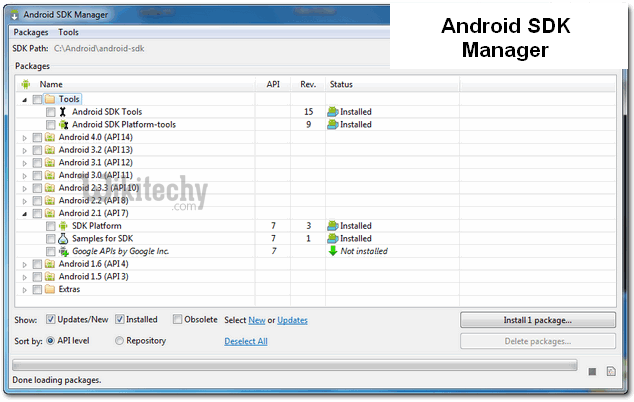
Latest version of Android SDK
4) Download the ADT plugin for eclipse
- ADT (Android Development Tools) is required for developing the android application in the eclipse IDE. It is the plugin for Eclipse IDE that is designed to provide the integrated environment.
- Start the eclipse IDE, then select Help > Install new software...
- In the work with combo box, write https://dl-ssl.google.com/android/eclipse/
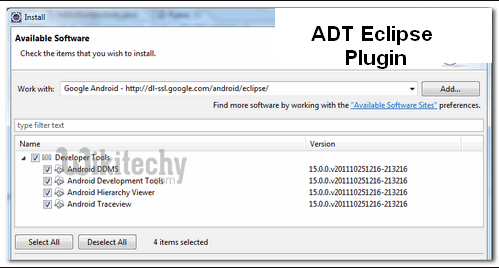
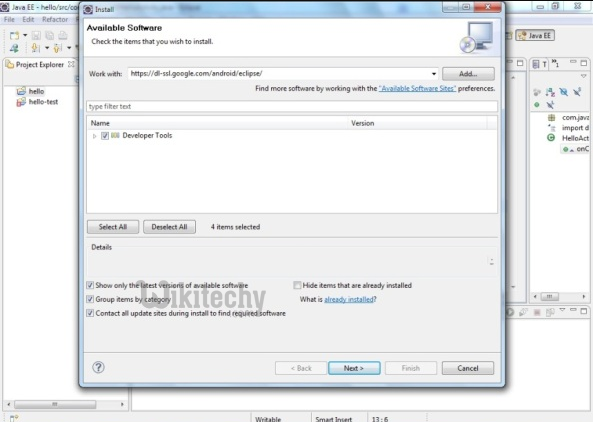
- select the checkbox next to Developer Tools and click next button
- You will see, a list of tools to be downloaded here, click next button
- click finish button
- After completing the installation, restart the eclipse IDE
5) Configuring the ADT plugin
After the installing ADT plugin, now tell the eclipse IDE for your android SDK location. To do so:
- Select the Window menu > preferences
- Select the android from the left panel. Here you may see a dialog box asking if you want to send the statistics to the google. Click proceed button
- Click on the browse button and locate your SDK directory. By default, the SDK location is C:\Program Files\Android\android-sdk .
- Click apply button to proceed further.
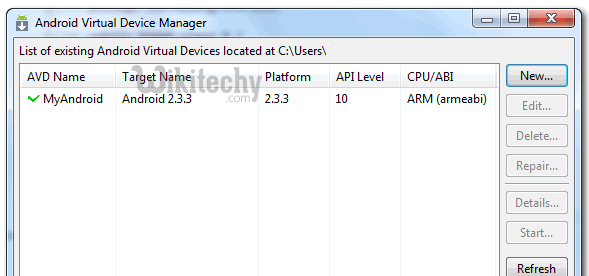
6) Create an Android Virtual Device (AVD)
For running the android application in the Android Emulator, you need to create and AVD. For creating the AVD:
- Select the Window menu > AVD Manager
- Click on the new button, to create the AVD
- Now a dialog appears, write the AVD name e.g. wikitechyavd. Now choose the target android version e.g. android2.2.
- click the create AVD