Android tutorial - Alert dialog in android | Android prompt user input dialog example - android app development - android studio - android development tutorial
Learn andriod - andriod tutorial - Alert dialog in android - andriod examples - andriod programs
What is Android prompt
- A prompt is text or symbols used to represent the system's readiness to perform the next command.
- A prompt may also be a text representation of where the user is currently. For example, an MS-DOS prompt or Windows command prompt may look like the example below.
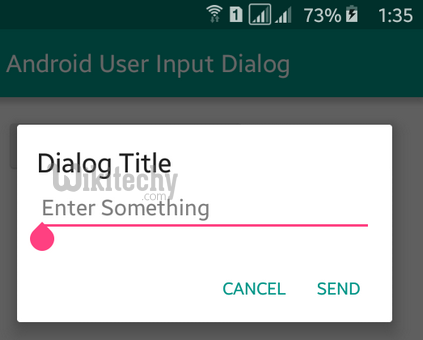
- we will enchance the previous Alert Dialog example, to make it able to accept user input, just like a Prompt Dialog. More specific, this is a custom Alert Dialog example.
- See following steps:
- Create a prompt dialog layout (XML file).
- Attach the prompt dialog layout to AlertDialog.Builder.
- Attach the AlertDialog.Builder to AlertDialog.
- Done.
What is Android prompt Android Layout Files
- Two XML files, one for main screen, one for prompt dialog.
- File : res/layout/main.xml
<?xml version="1.0" encoding="utf-8"?>
<LinearLayout xmlns:android="http://schemas.android.com/apk/res/android"
    android:layout_width="fill_parent"
    android:layout_height="fill_parent"
    android:orientation="vertical" >

    <Button
        android:id="@+id/buttonPrompt"
        android:layout_width="wrap_content"
        android:layout_height="wrap_content"
        android:text="Show Prompt Dialog" />

    <EditText
        android:id="@+id/editTextResult"
        android:layout_width="match_parent"
        android:layout_height="wrap_content" >

    </EditText>

</LinearLayout>
click below button to copy the code from android tutorial team
- File : res/layout/prompts.xml
<?xml version="1.0" encoding="utf-8"?>
<LinearLayout xmlns:android="http://schemas.android.com/apk/res/android"
    android:id="@+id/layout_root"
    android:layout_width="fill_parent"
    android:layout_height="fill_parent"
    android:orientation="vertical"
    android:padding="10dp" >

    <TextView
        android:id="@+id/textView1"
        android:layout_width="wrap_content"
        android:layout_height="wrap_content"
        android:text="Type Your Message : "
        android:textAppearance="?android:attr/textAppearanceLarge" />

    <EditText
        android:id="@+id/editTextDialogUserInput"
        android:layout_width="match_parent"
        android:layout_height="wrap_content" >

        <requestFocus />

    </EditText>

</LinearLayout>
click below button to copy the code from android tutorial team
Activity
- Read the comment and Demo - android emulator - android tutorial in next step, it should be self-explorary.
- File : MainActivity.java
package com.wikitechy.android;

import android.app.Activity;
import android.app.AlertDialog;
import android.content.Context;
import android.content.DialogInterface;
import android.os.Bundle;
import android.view.LayoutInflater;
import android.view.View;
import android.view.View.OnClickListener;
import android.widget.Button;
import android.widget.EditText;

public class MainActivity extends Activity {

	final Context context = this;
	private Button button;
	private EditText result;

	public void onCreate(Bundle savedInstanceState) {

		super.onCreate(savedInstanceState);
		setContentView(R.layout.main);

		// components from main.xml
		button = (Button) findViewById(R.id.buttonPrompt);
		result = (EditText) findViewById(R.id.editTextResult);

		// add button listener
		button.setOnClickListener(new OnClickListener() {

			@Override
			public void onClick(View arg0) {

				// get prompts.xml view
				LayoutInflater li = LayoutInflater.from(context);
				View promptsView = li.inflate(R.layout.prompts, null);

				AlertDialog.Builder alertDialogBuilder = new AlertDialog.Builder(
						context);

				// set prompts.xml to alertdialog builder
				alertDialogBuilder.setView(promptsView);

				final EditText userInput = (EditText) promptsView
						.findViewById(R.id.editTextDialogUserInput);

				// set dialog message
				alertDialogBuilder
					.setCancelable(false)
					.setPositiveButton("OK",
					  new DialogInterface.OnClickListener() {
					    public void onClick(DialogInterface dialog,int id) {
						// get user input and set it to result
						// edit text
						result.setText(userInput.getText());
					    }
					  })
					.setNegativeButton("Cancel",
					  new DialogInterface.OnClickListener() {
					    public void onClick(DialogInterface dialog,int id) {
						dialog.cancel();
					    }
					  });

				// create alert dialog
				AlertDialog alertDialog = alertDialogBuilder.create();

				// show it
				alertDialog.show();

			}
		});
	}
}
click below button to copy the code from android tutorial team
Demo - android emulator - android tutorial
- Start it, the “main.xml” layout is display a button and edit text (result).
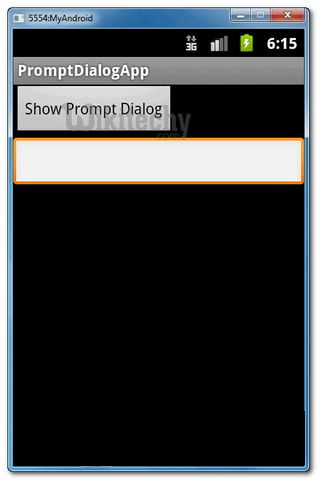
- Click on the button, display a prompt dialog “prompts.xml” layout, type message “wikitechy“, and click on the “OK” button.
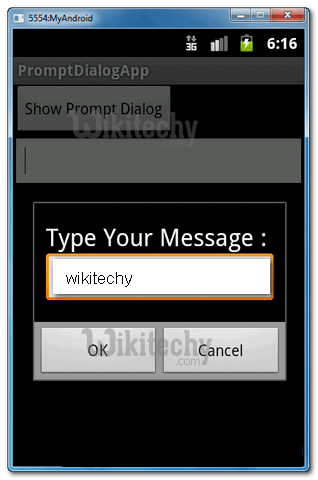
- User input “wikitechy” will pass to the “main.xml” layout, edittext (result), and display it.
