Listbox Control in C# - C# ListBox Control
Listbox Control in C# - C# ListBox Control
- In C#, the List Box control provides us a user interface that will display the List of the items.
- From there, the users can select one or more items from the List.
- We can use the List Box to show the multiple columns, and these columns can contain images and other controls.
List Box Control Creation in C#
- We will follow the two approaches in Windows Form, for creating the list box.
- To create the List Box control, either we can use the List Box class for creating control or we can use the Forms Designer at the time of the designing at the run time.
Dynamically approach to create the List Box
- In Windows form list box class shows the List Box control and for the runtime execution to create the List Box, firstly, we will create the instance of the List Box class and set its properties and will add the List Box object to the Form Control.
Step 1
- We will create the instance of the List Box class, to create the Dynamic List Box in the first.
- To create the object of the List Box, we will write the below code:
ListBox List1 = new ListBox();
Step 2
- We will set the properties of the List Box control, in the next step.
- In the property we will set the Location, width, height, background color, foreground color, name and font properties of the List Box, as shown below:
ListBox box = new ListBox();
box.Location = new Point(300, 110);
box.Size = new Size(160, 103);
box.ForeColor = Color.Purple;
box.Items.Add(765);
box.Items.Add(875);
box.Items.Add(345);
Step 3
- If the properties are set with the List Box control, in the next step we will add the List Box to the Form.
- For this we will use the Form.Controls.Add method which will add the List Box control to the Form control and will display it on the Form according to their location, and size.
// Now we will add ListBox control to the form
            this.Controls.Add(box);
Sample Code
using System;
using System.Collections.Generic;
using System.ComponentModel;
using System.Data;
using System.Drawing;
using System.Linq;
using System.Text;
using System.Threading.Tasks;
using System.Windows.Forms;
namespace WindowsFormsApp5
{
public partial class Form1: Form
{
public Form1()
{
InitializeComponent();
}
ListBox ListItem = new ListBox();
private void Form1_Load(object sender, EventArgs e)
{
ListItem.Location = new System.Drawing.Point(15, 15);
ListItem.Name = "ListItem";
ListItem.Size = new System.Drawing.Size(350, 400);
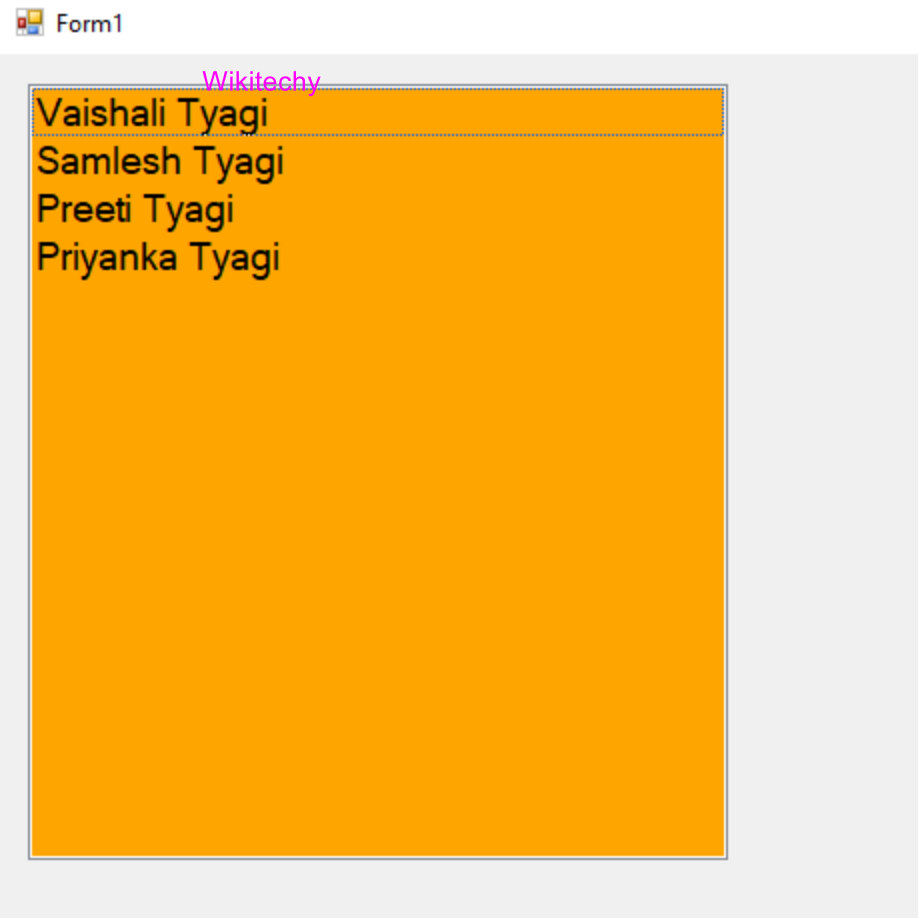
ListItem.BackColor = System.Drawing.Color.Orange;
ListItem.ForeColor = System.Drawing.Color.Black;
ListItem.Items.Add("Vaishali Tyagi");
ListItem.Items.Add("Samlesh Tyagi");
ListItem.Items.Add("Preeti Tyagi");
ListItem.Items.Add("Priyanka Tyagi");
this.Controls.Add(ListItem);
}
}
}
Output
Creating an Application in C# using the List Box
Step 1
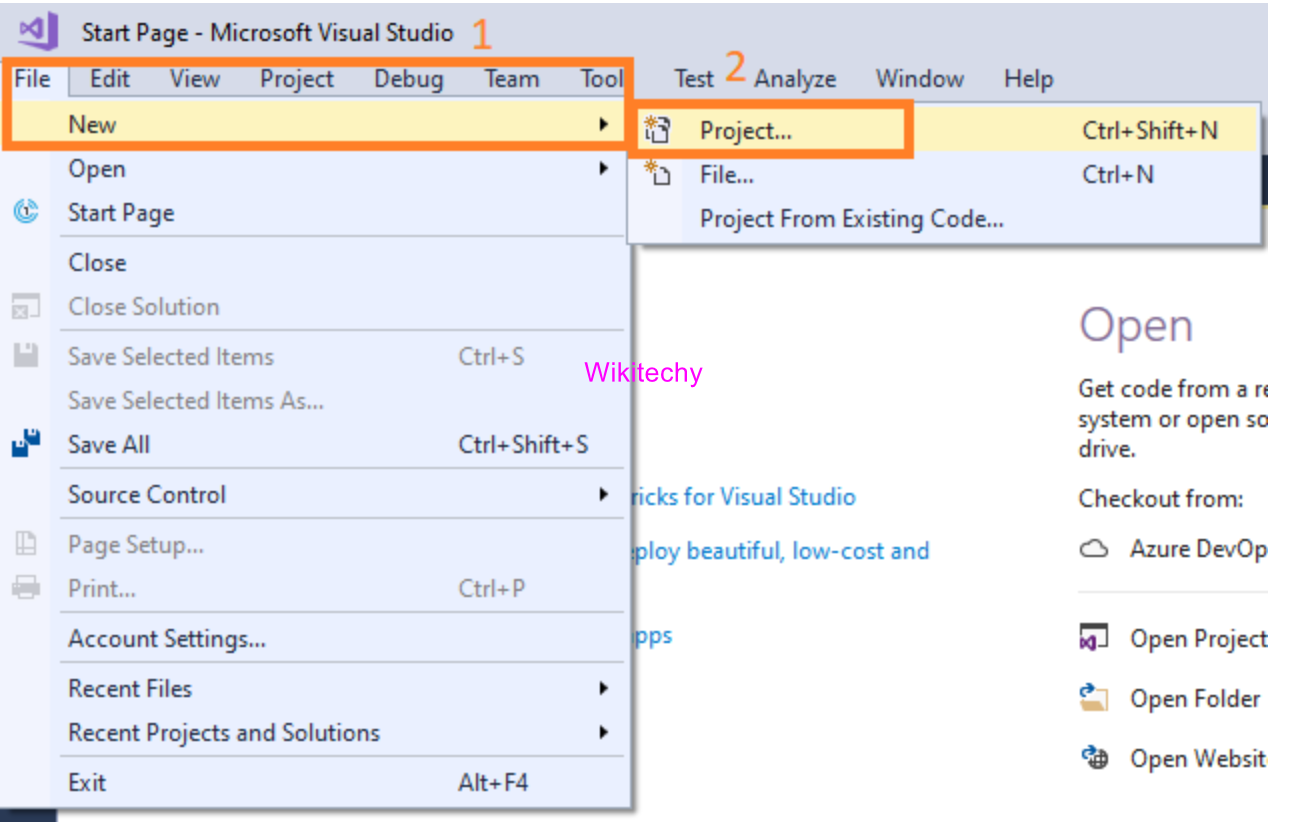
- First, we will create a new project for the creation of the project.
Step 2
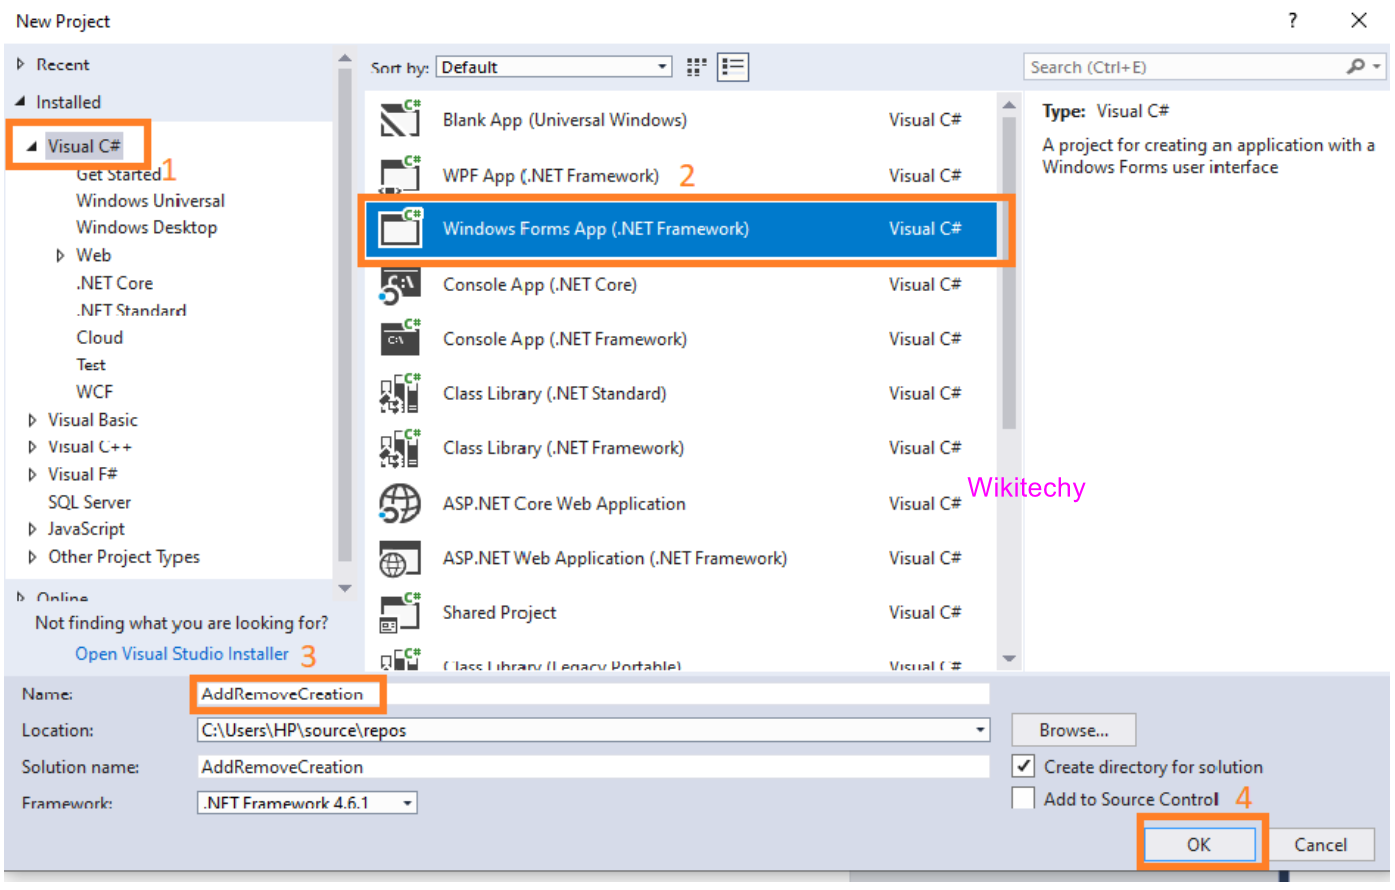
- After this, a new window will display, where we select the Visual C#->Windows Form Application->Name of the project(Add Remove Creation) and click ok.
Step 3
- After this, a Form will create as shown in the below screenshot:
Step 4
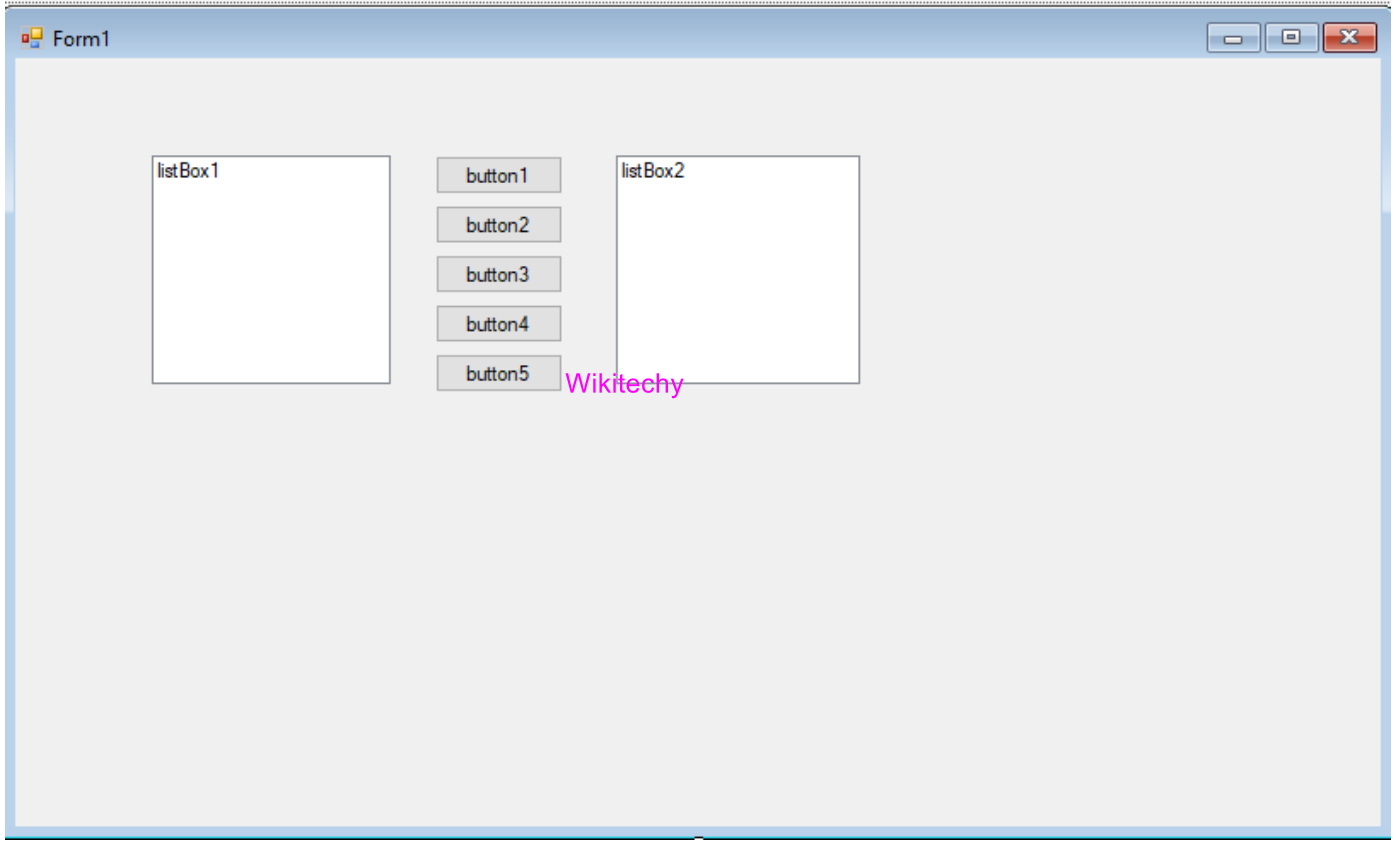
- We will Drag and Drop the List Box from the toolbox, in the next.
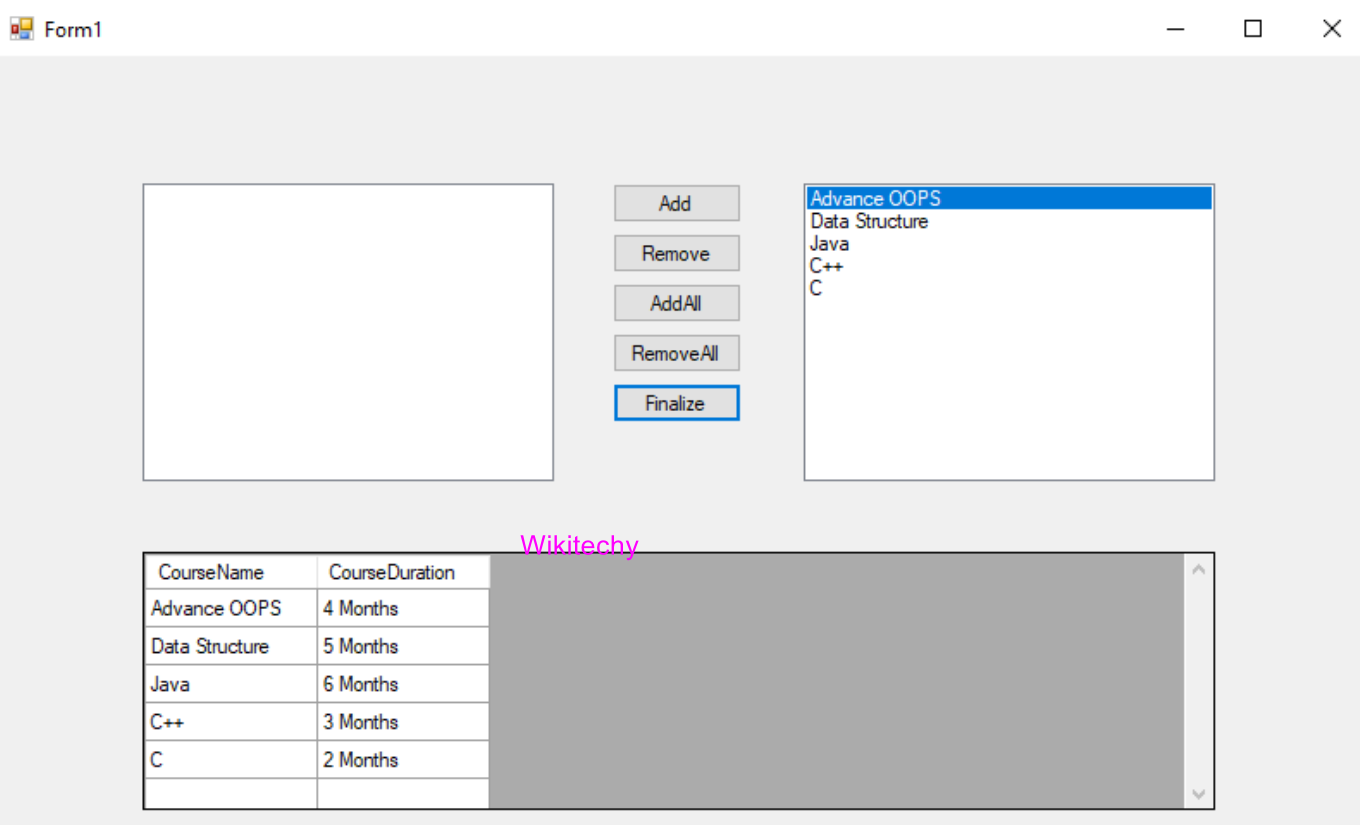
- Here we are going to take two List Box(ListBox1 and ListBox2) and Five buttons(Add, Remove, Add All, Remove All and Finalize).
Step 5
- We will change the text and name of the button by right-clicking on the button->choose properties->change the text name as shown.
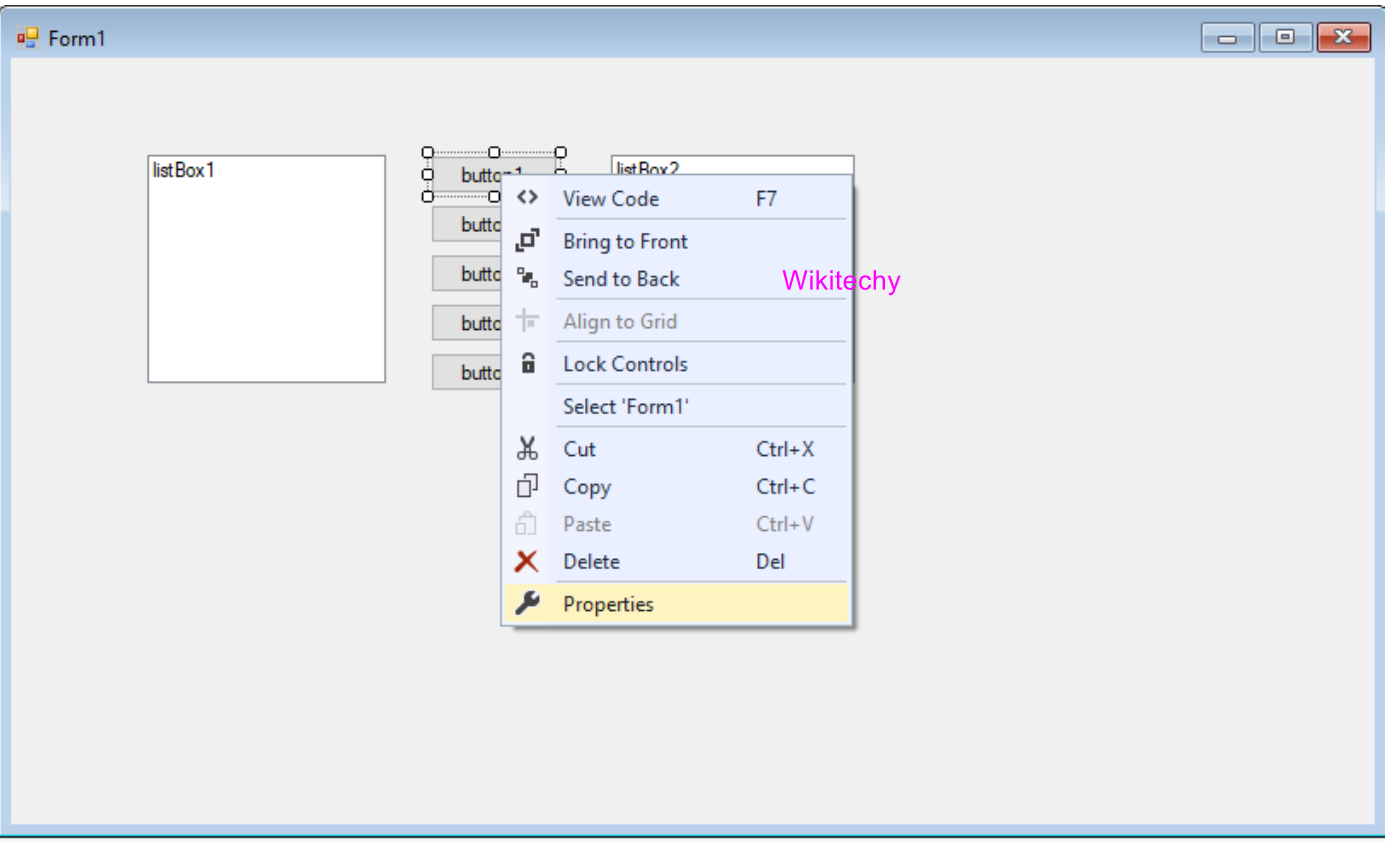
Step 6
- After clicking on the properties, the property window will open where we will change the name of the button and the text on the button as shown.

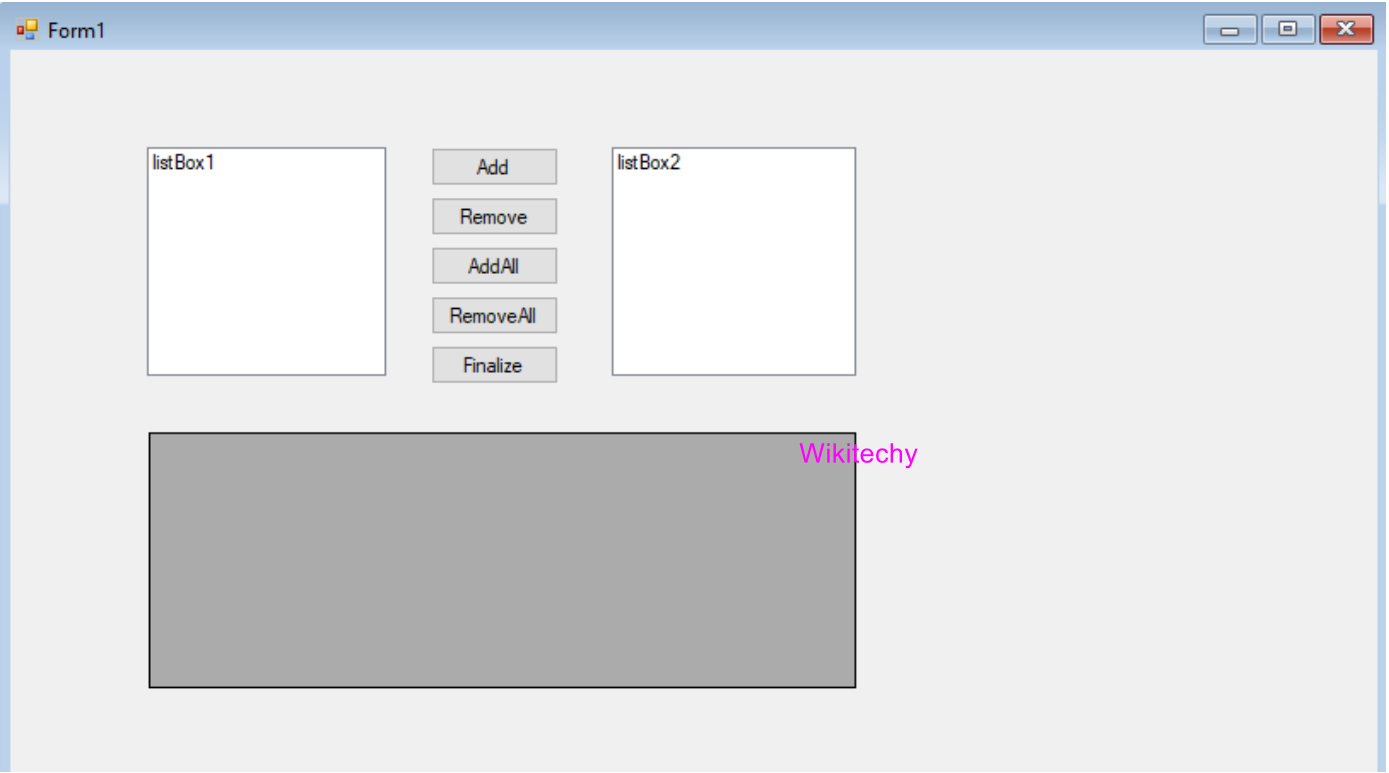
Step 7
- After this, we are going to show the data after clicking on the finalize button in the Grid View. For this, we will click on the Data->Grid View.
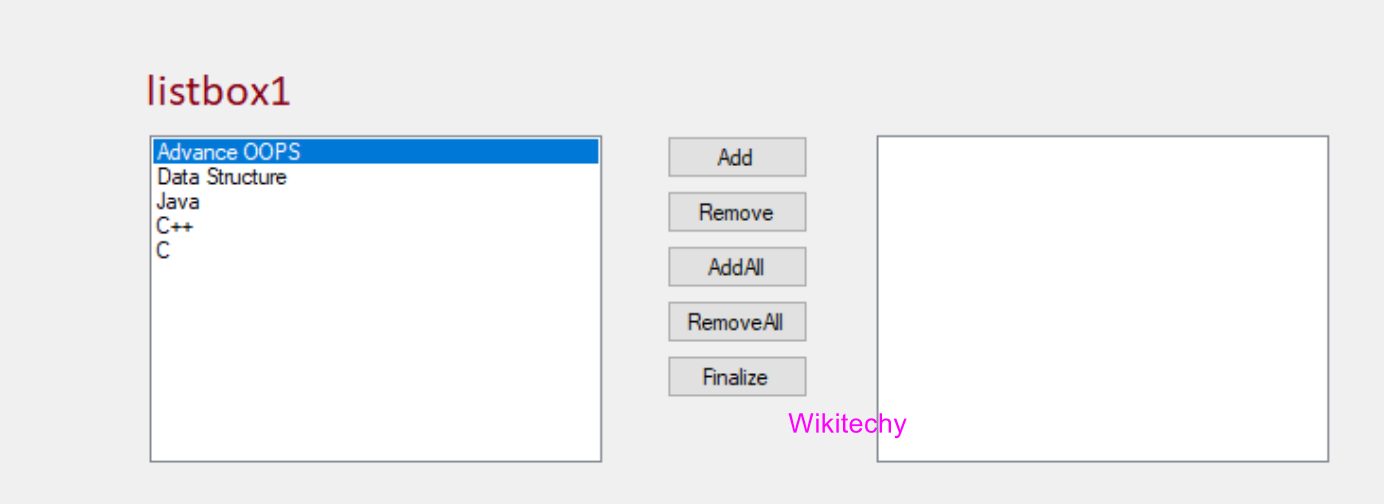
How to add the data in the listbox1 and import the data in ListBox
using System;
using System.Collections.Generic;
using System.ComponentModel;
using System.Data;
using System.Drawing;
using System.Linq;
using System.Text;
using System.Threading.Tasks;
using System.Windows.Forms;

namespace AddRemoveCreation
{
     public partial class Form1: Form
    {
        //create an object dtCourse of the DataTable.
        private DataTable dtCourse = new DataTable();
        //create an object dtSelectedCourse of the DataTable.
        private DataTable dtSelectedCourse = new DataTable();

        public Form1()
        {
            //InitializeComponent() is used to initialize the form.
            InitializeComponent();
        }

        private void Form1_Load(object sender, EventArgs e)
        {
            //call the function at the form loading
            FillCouseTable();
            SelectedCourseTable();
            //Add the value in the DataSource of the ListBox1
            listBox1.DataSource = dtCourse;
            //listbox1.DisplayMember is used to decide which column we want to show in the final output
            listBox1.DisplayMember = "CourseName";
            //dtSelectedCourse datatable add the value in the listbox2 datasource
            listBox2.DataSource = dtSelectedCourse;
            listBox2.DisplayMember = "CourseName";


        }
        //FillCourseTable() function is declare to add the data in the datatable with the help of the data object
        private void FillCouseTable()
        {
            //adding the column name
            dtCourse.Columns.Add("CourseID", typeof(int));
            dtCourse.Columns.Add("CourseName");
            dtCourse.Columns.Add("CourseDuration");
            //add the data in the dtCourse table
            dtCourse.Rows.Add(1, "Advance OOPS", "4 Months");
            dtCourse.Rows.Add(2, "Data Structure", "5 Months");
            dtCourse.Rows.Add(3, "Java", "6 Months");
            dtCourse.Rows.Add(4, "C++", "3 Months");
            dtCourse.Rows.Add(5, "C", "2 Months");


        }
        //SelectedCourseTable() function is declare which contain the column name of the data table.
        private void SelectedCourseTable()
        {
            dtSelectedCourse.Columns.Add("CourseID", typeof(int));
            dtSelectedCourse.Columns.Add("CourseName");
            dtSelectedCourse.Columns.Add("CourseDuration");

        }
        //After clicking on the add button function Addbtn_Click() is create which contain the functionality of Add button

        private void Addbtn_Click(object sender, EventArgs e)
        {
            //if the condition applies if the listbox1 contain the item greater than zero then this will import the data in the listbox2 and delete the data from the listbox1
            if(listBox1.Items.Count>0)
            {
                //Here we are improting the data to the dtSelectedCourse datatable from the dtcourse datatable
                dtSelectedCourse.ImportRow(dtCourse.Rows[listBox1.SelectedIndex]);
                dtCourse.Rows[listBox1.SelectedIndex].Delete();
            }
        }
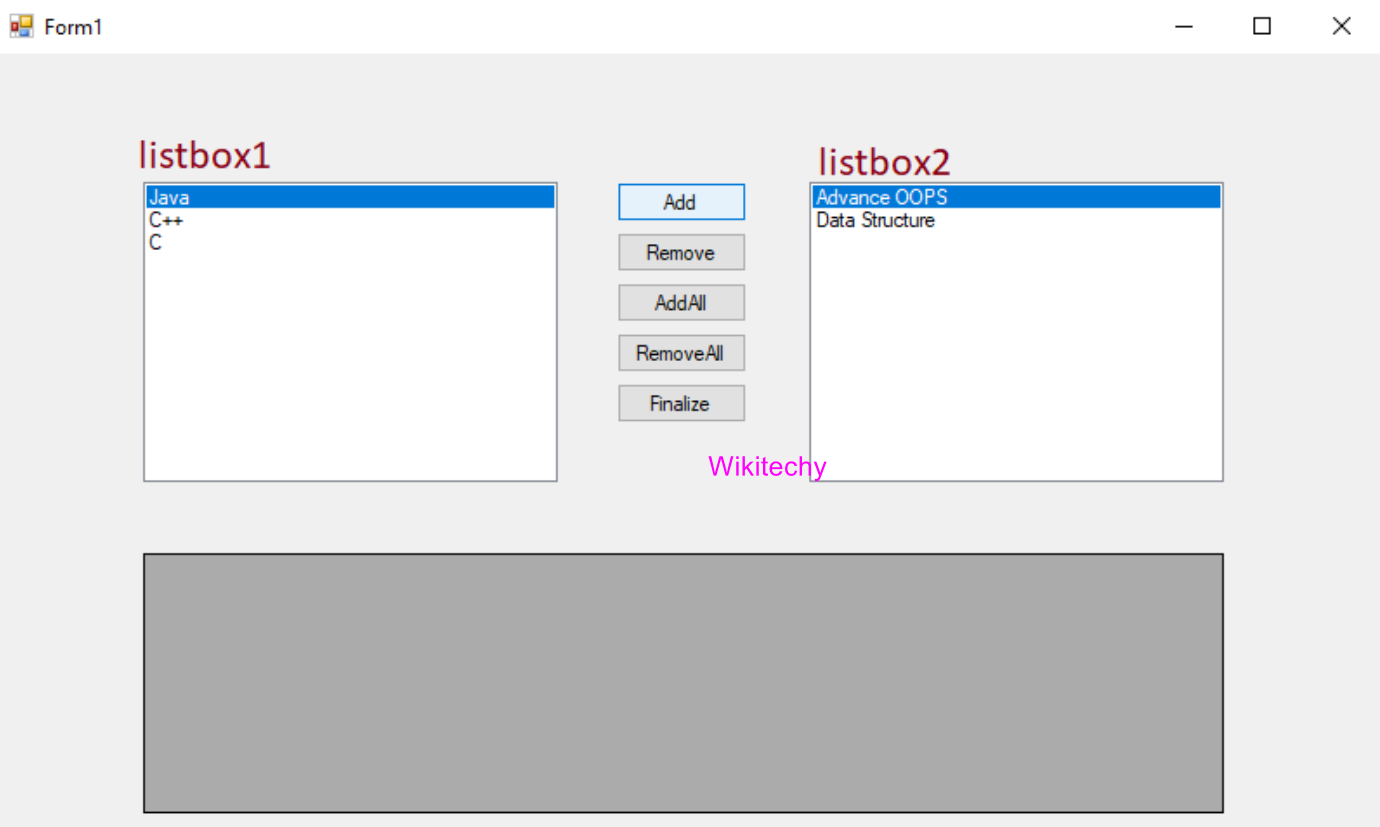
We are going to show that the listbox1 containing the data
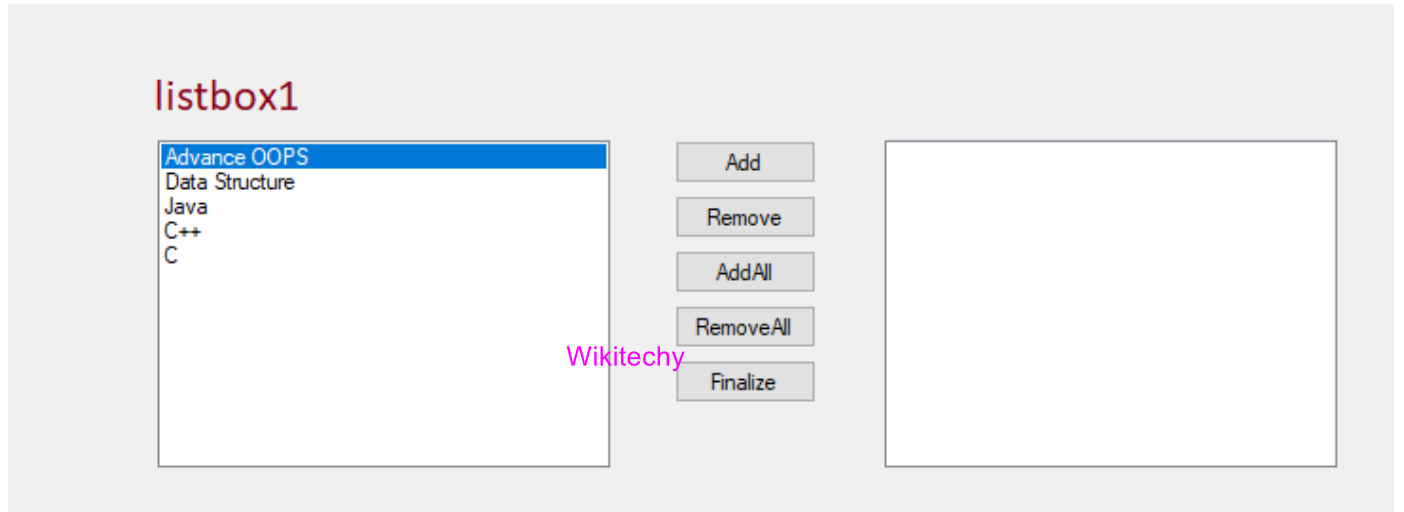
- After clicking on the Add button, data will be added to the listbox2 and gets deleted from the listbox1.
Remove the data from the List Box
using System;
using System.Collections.Generic;
using System.ComponentModel;
using System.Data;
using System.Drawing;
using System.Linq;
using System.Text;
using System.Threading.Tasks;
using System.Windows.Forms;

namespace AddRemoveCreation
{
     public partial class Form1: Form
    {
        //create an object dtCourse of the DataTable.
        private DataTable dtCourse = new DataTable();
        //create an object dtSelectedCourse of the DataTable.
        private DataTable dtSelectedCourse = new DataTable();

        public Form1()
        {
            //InitializeComponent() is used to initialize the form.
            InitializeComponent();
        }

        private void Form1_Load(object sender, EventArgs e)
        {
            //call the function at the form loading
            FillCouseTable();
            SelectedCourseTable();
            //Add the value in the DataSource of the ListBox1
            listBox1.DataSource = dtCourse;
            //listbox1.DisplayMember is used to decide which column we want to show in the final output
            listBox1.DisplayMember = "CourseName";
            //dtSelectedCourse datatable add the value in the listbox2 datasource
            listBox2.DataSource = dtSelectedCourse;
            listBox2.DisplayMember = "CourseName";


        }
        //FillCourseTable() function is declare to add the data in the datatable with the help of the data object
        private void FillCouseTable()
        {
            //adding the column name
            dtCourse.Columns.Add("CourseID", typeof(int));
            dtCourse.Columns.Add("CourseName");
            dtCourse.Columns.Add("CourseDuration");
            //add the data in the dtCourse table
            dtCourse.Rows.Add(1, "Advance OOPS", "4 Months");
            dtCourse.Rows.Add(2, "Data Structure", "5 Months");
            dtCourse.Rows.Add(3, "Java", "6 Months");
            dtCourse.Rows.Add(4, "C++", "3 Months");
            dtCourse.Rows.Add(5, "C", "2 Months");


        }
        //SelectedCourseTable() function is declare which contain the column name of the data table.
        private void SelectedCourseTable()
        {
            dtSelectedCourse.Columns.Add("CourseID", typeof(int));
            dtSelectedCourse.Columns.Add("CourseName");
            dtSelectedCourse.Columns.Add("CourseDuration");

        }


//After clicking on the Remove button Removebtn_Click() function is created where we remove the element from the listbox2 and import the data in the data table.

        private void Removebtn_Click(object sender, EventArgs e)
        {
            //for removing the element we apply condition if listbox contain the element greater than zero
            if (listBox2.Items.Count > 0)
            {
                //here the data will be import to the datatable dtcourse from the dtSelected Database.
                dtCourse.ImportRow(dtSelectedCourse.Rows[listBox2.SelectedIndex]);
                //All data will be deleted from the datatable dtSelectedCourse
                dtSelectedCourse.Rows[listBox2.SelectedIndex].Delete();
            }
        }
}
}
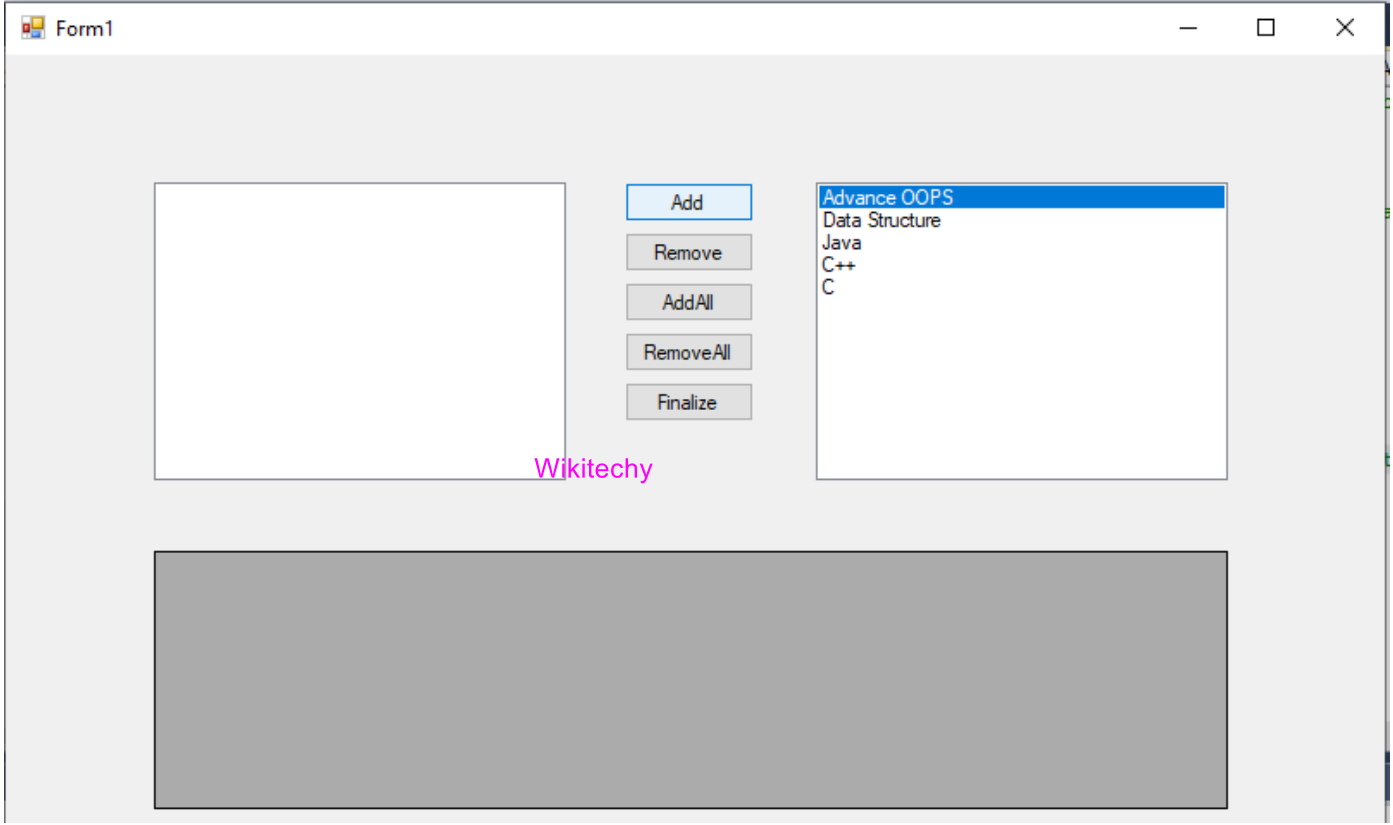
- Before removing the data, the whole data is in the listbox2 and the listbox1 does not contain any value. The output will look like as shown below.
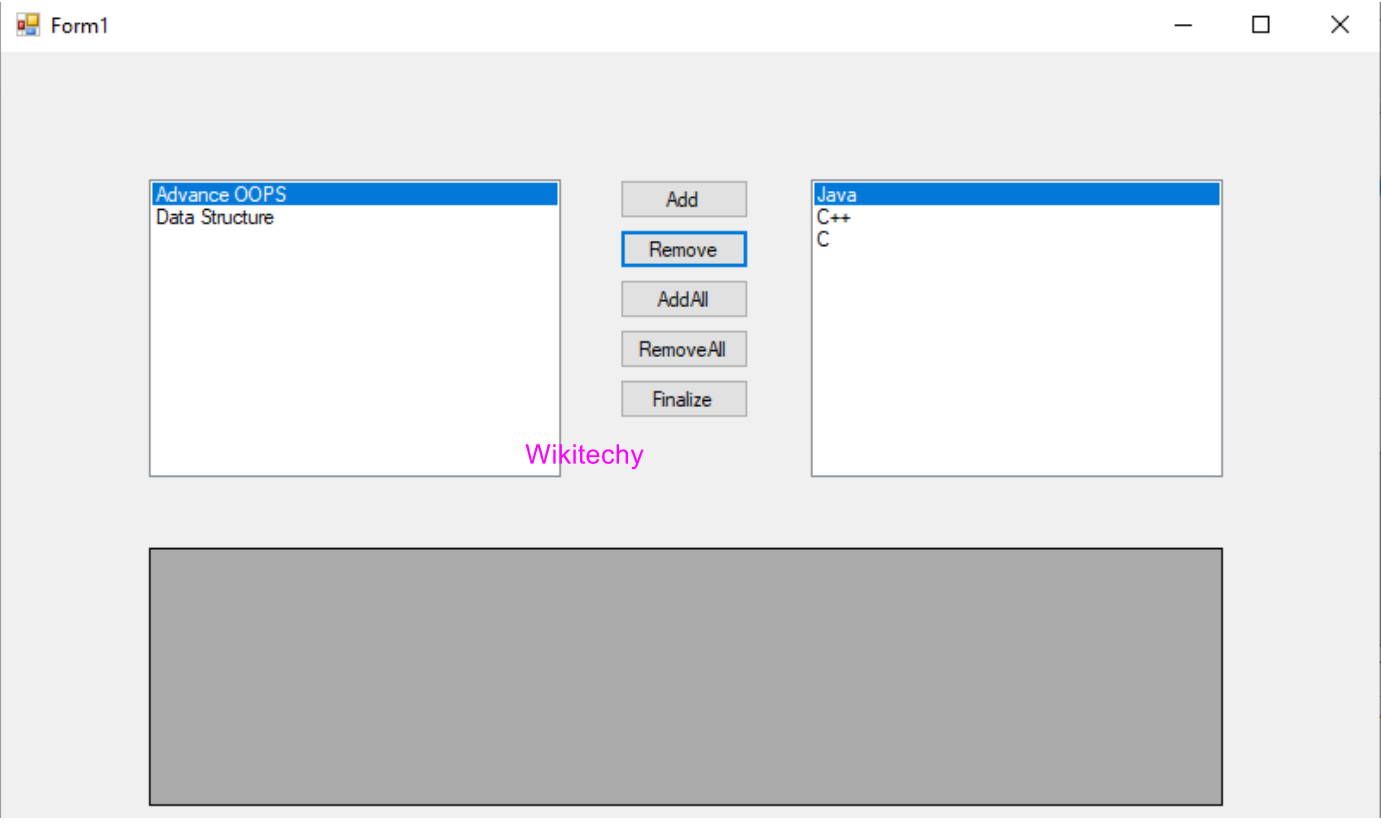
- After clicking on the remove button, data is going to be deleted from the list box 2 and added to the listbox1, as shown.
Adding the whole data in one go in the List Box
using System;
using System.Collections.Generic;
using System.ComponentModel;
using System.Data;
using System.Drawing;
using System.Linq;
using System.Text;
using System.Threading.Tasks;
using System.Windows.Forms;

namespace AddRemoveCreation
{
     public partial class Form1: Form
    {
        //create an object dtCourse of the DataTable.
        private DataTable dtCourse = new DataTable();
        //create an object dtSelectedCourse of the DataTable.
        private DataTable dtSelectedCourse = new DataTable();

        public Form1()
        {
            //InitializeComponent() is used to initialize the form.
            InitializeComponent();
        }

        private void Form1_Load(object sender, EventArgs e)
        {
            //call the function at the form loading
            FillCouseTable();
            SelectedCourseTable();
            //Add the value in the DataSource of the ListBox1
            listBox1.DataSource = dtCourse;
            //listbox1.DisplayMember is used to decide which column we want to show in the final output
            listBox1.DisplayMember = "CourseName";
            //dtSelectedCourse datatable add the value in the listbox2 datasource
            listBox2.DataSource = dtSelectedCourse;
            listBox2.DisplayMember = "CourseName";


        }
        //FillCourseTable() function is declare to add the data in the datatable with the help of the data object
        private void FillCouseTable()
        {
            //adding the column name
            dtCourse.Columns.Add("CourseID", typeof(int));
            dtCourse.Columns.Add("CourseName");
            dtCourse.Columns.Add("CourseDuration");
            //add the data in the dtCourse table
            dtCourse.Rows.Add(1, "Advance OOPS", "4 Months");
            dtCourse.Rows.Add(2, "Data Structure", "5 Months");
            dtCourse.Rows.Add(3, "Java", "6 Months");
            dtCourse.Rows.Add(4, "C++", "3 Months");
            dtCourse.Rows.Add(5, "C", "2 Months");


        }
        //SelectedCourseTable() function is declare which contain the column name of the data table.
        private void SelectedCourseTable()
        {
            dtSelectedCourse.Columns.Add("CourseID", typeof(int));
            dtSelectedCourse.Columns.Add("CourseName");
            dtSelectedCourse.Columns.Add("CourseDuration");

        }
        //After clicking on the AddAll button AddAllbtn_Click() function is create.
        private void AddAllbtn_Click(object sender, EventArgs e)
        {
            //if condition is apply this will check if the listbox contain the element greater than zero.
            if(listBox1.Items.Count>0)
            {
                //dtCourse.Rows.Count will count the element and assign the value in the count variable.
                int count = dtCourse.Rows.Count;
                //for condition is apply this will going upto the count
                for(int i=count-1;i>=0;i--)
                {
                    //dtCourse.Rows[listbox1.SelectedIndex] with the help of this data will be import to the dtSelected datatable.
                    dtSelectedCourse.ImportRow(dtCourse.Rows[listBox1.SelectedIndex]);
                    //with this code data eill be delete from the dtCourse datatable.
                    dtCourse.Rows[listBox1.SelectedIndex].Delete();

                }
            }
        }
}
}
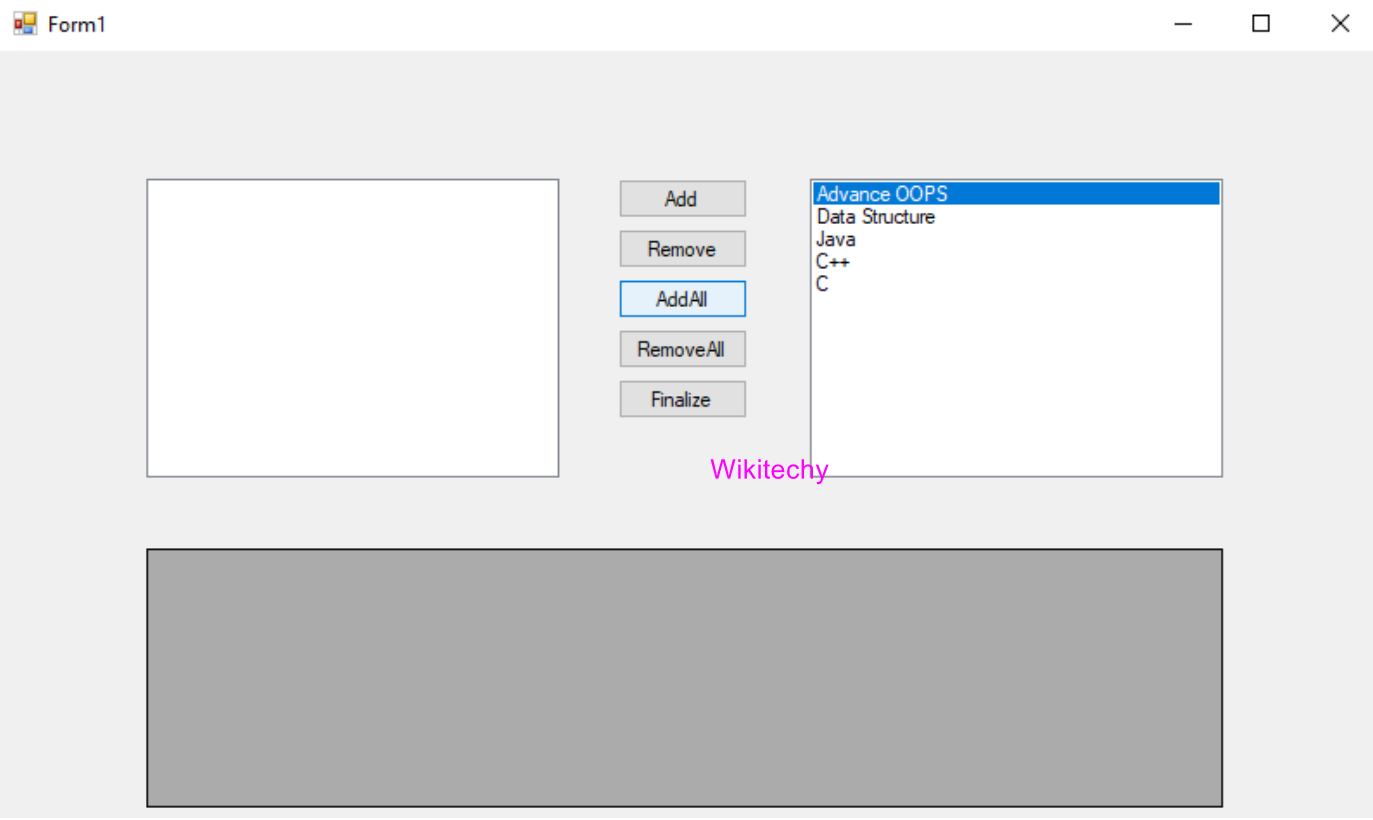
Output
- After writing this code, the Add All button will work, as shown;
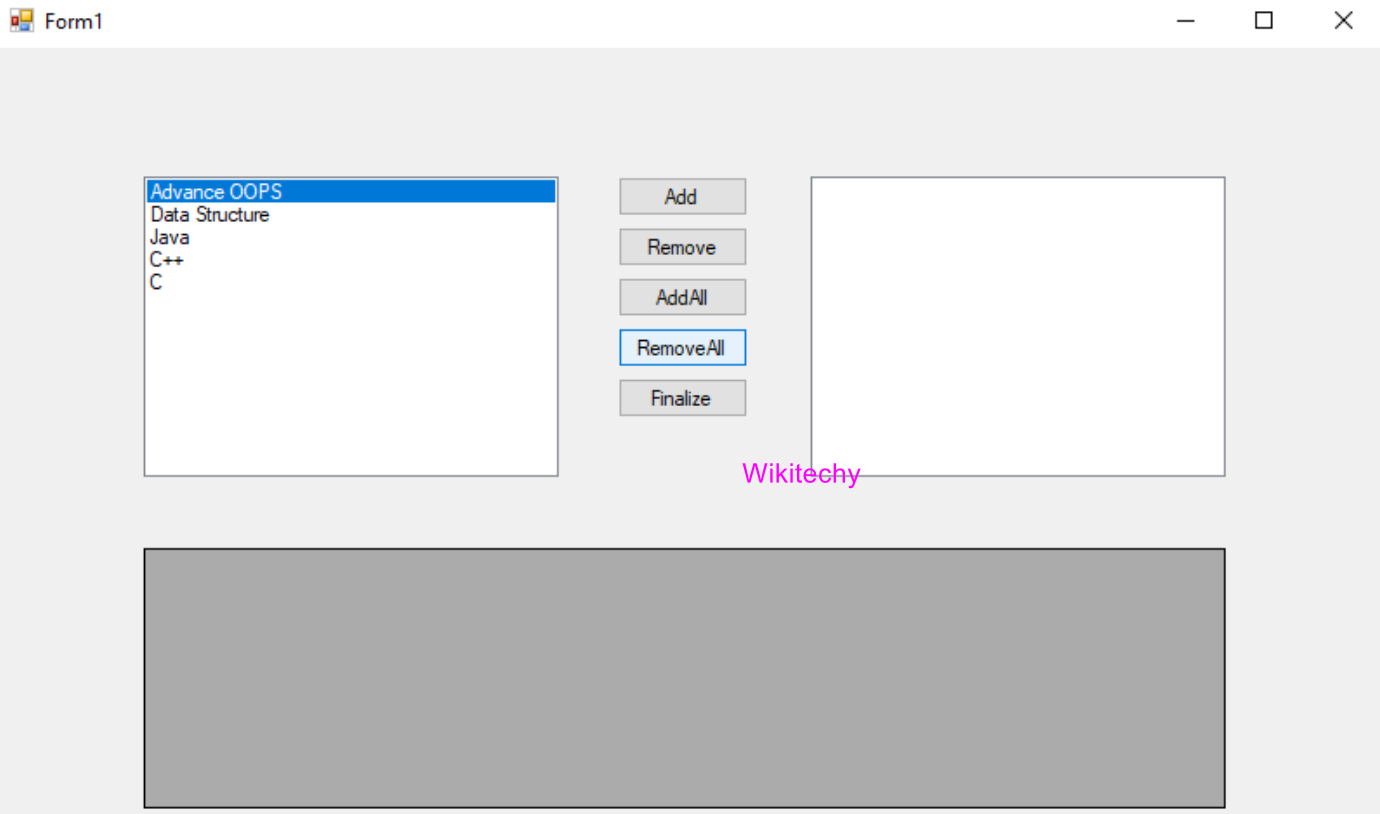
Remove all the data from the List Box
- Here, we will remove all the data from the listbox2 and add all the data in the listbox1.
- To remove all the data from the List box, we will write the following code.
using System;
using System.Collections.Generic;
using System.ComponentModel;
using System. Data;
using System. Drawing;
using System. Linq;
using System. Text;
using System.Threading.Tasks;
using System.Windows.Forms;

namespace AddRemoveCreation
{
     public partial class Form1: Form
    {
        //create an object dtCourse of the DataTable.
        private DataTable dtCourse = new DataTable();
        //create an object dtSelectedCourse of the DataTable.
        private DataTable dtSelectedCourse = new DataTable();

        public Form1()
        {
            //InitializeComponent() is used to initialize the form.
            InitializeComponent();
        }

        private void Form1_Load(object sender, EventArgs e)
        {
            //call the function at the form loading
            FillCouseTable();
            SelectedCourseTable();
            //Add the value in the DataSource of the ListBox1
            listBox1.DataSource = dtCourse;
            //listbox1.DisplayMember is used to decide which column we want to show in the final output
            listBox1.DisplayMember = "CourseName";
            //dtSelectedCourse datatable add the value in the listbox2 datasource
            listBox2.DataSource = dtSelectedCourse;
            listBox2.DisplayMember = "CourseName";


        }
        //FillCourseTable() function is declare to add the data in the datatable with the help of the data object
        private void FillCouseTable()
        {
            //adding the column name
            dtCourse.Columns.Add("CourseID", typeof(int));
            dtCourse.Columns.Add("CourseName");
            dtCourse.Columns.Add("CourseDuration");
            //add the data in the dtCourse table
            dtCourse.Rows.Add(1, "Advance OOPS", "4 Months");
            dtCourse.Rows.Add(2, "Data Structure", "5 Months");
            dtCourse.Rows.Add(3, "Java", "6 Months");
            dtCourse.Rows.Add(4, "C++", "3 Months");
            dtCourse.Rows.Add(5, "C", "2 Months");


        }
        //SelectedCourseTable() function is declare which contain the column name of the data table.
        private void SelectedCourseTable()
        {
            dtSelectedCourse.Columns.Add("CourseID", typeof(int));
            dtSelectedCourse.Columns.Add("CourseName");
            dtSelectedCourse.Columns.Add("CourseDuration");

        }

//After clicking on the Remove button RemoveAllbtn_Click() function is create.

        private void RemoveAllbtn_Click(object sender, EventArgs e)
        {
            //if the condition is applied, this will count the listbox2 containing the value.

            if (listBox2.Items.Count > 0)
            {
                int count = dtSelectedCourse.Rows.Count;
                //for loop is apply which will go upto the greater than zero
                for (int i = count - 1; i >= 0; i--)
                {
                    //dtCourse datatable import the data from the dtSelectedCourse datatable.
                    dtCourse.ImportRow(dtSelectedCourse.Rows[listBox2.SelectedIndex]);
                    //data will be deleted from the dtSelectedCourse datatable.
                    dtSelectedCourse.Rows[listBox2.SelectedIndex].Delete();
                }

            }
        }
}
}
Output
Showing the data of the List Box in the Grid View
- Here, we will use Grid View to show all the data of the ListBox2 after clicking on the finalize button.
- To show the data in the Grid View, we will write the following code.
Sample Code
using System;
using System.Collections.Generic;
using System.ComponentModel;
using System. Data;
using System. Drawing;
using System. Linq;
using System. Text;
using System.Threading.Tasks;
using System.Windows.Forms;

namespace AddRemoveCreation
{
    public partial class Form1: Form
    {
        //create an object dtCourse of the DataTable.
        private DataTable dtCourse = new DataTable();
        //create an object dtSelectedCourse of the DataTable.
        private DataTable dtSelectedCourse = new DataTable();

        public Form1()
        {
            //InitializeComponent() is used to initialize the form.
            InitializeComponent();
        }

        private void Form1_Load(object sender, EventArgs e)
        {
            //call the function at the form loading
            FillCouseTable();
            SelectedCourseTable();
            //Add the value in the DataSource of the ListBox1
            listBox1.DataSource = dtCourse;
            //listbox1.DisplayMember is used to decide which column we want to show in the final output
            listBox1.DisplayMember = "CourseName";
            //dtSelectedCourse datatable add the value in the listbox2 datasource
            listBox2.DataSource = dtSelectedCourse;
            listBox2.DisplayMember = "CourseName";


        }
        //FillCourseTable() function is declare to add the data in the datatable with the help of the data object
        private void FillCouseTable()
        {
            //adding the column name
            dtCourse.Columns.Add("CourseID", typeof(int));
            dtCourse.Columns.Add("CourseName");
            dtCourse.Columns.Add("CourseDuration");
            //add the data in the dtCourse table
            dtCourse.Rows.Add(1, "Advance OOPS", "4 Months");
            dtCourse.Rows.Add(2, "Data Structure", "5 Months");
            dtCourse.Rows.Add(3, "Java", "6 Months");
            dtCourse.Rows.Add(4, "C++", "3 Months");
            dtCourse.Rows.Add(5, "C", "2 Months");


        }
        //SelectedCourseTable() function is declare which contain the column name of the data table.
        private void SelectedCourseTable()
        {
            dtSelectedCourse.Columns.Add("CourseID", typeof(int));
            dtSelectedCourse.Columns.Add("CourseName");
            dtSelectedCourse.Columns.Add("CourseDuration");

        }

//Clicking on the Finalize button Finalizebtn_Click() function is create

        private void Finalizebtn_Click(object sender, EventArgs e)
        {
            // create an object of the DialoResult where we will show the message with the help of the MessageBox.Show() function.
            DialogResult dialog=MessageBox.Show("Are you sure you want to finalize the selected course", "Confirmation Message", MessageBoxButtons.YesNo, MessageBoxIcon.Question);
            //Condition is apply if the result is yes.
            if(dialog==DialogResult.Yes)
            {
                //Shows the result of the dtSelectedCourse datatable to GridView.
                dataGridView1.DataSource = dtSelectedCourse;
                //to stop the editing we enable the datagridview to false.
                dataGridView1.Enabled = false;
                //With this code we apply the visiblity of the column index 0 to false.
                dataGridView1.Columns[0].Visible = false;
                //hide the header value of the row
                dataGridView1.RowHeadersVisible = false;
            }
            else
            {
                //If the result no, then shows the message with the help of the MessageBox.Show().
                MessageBox.Show("Please Select Atleast one course","Information Message", MessageBoxButtons.YesNo, MessageBoxIcon.Information);
            }
        }
}
}
Output
- After clicking on the Finalize button, confirmation message will display.
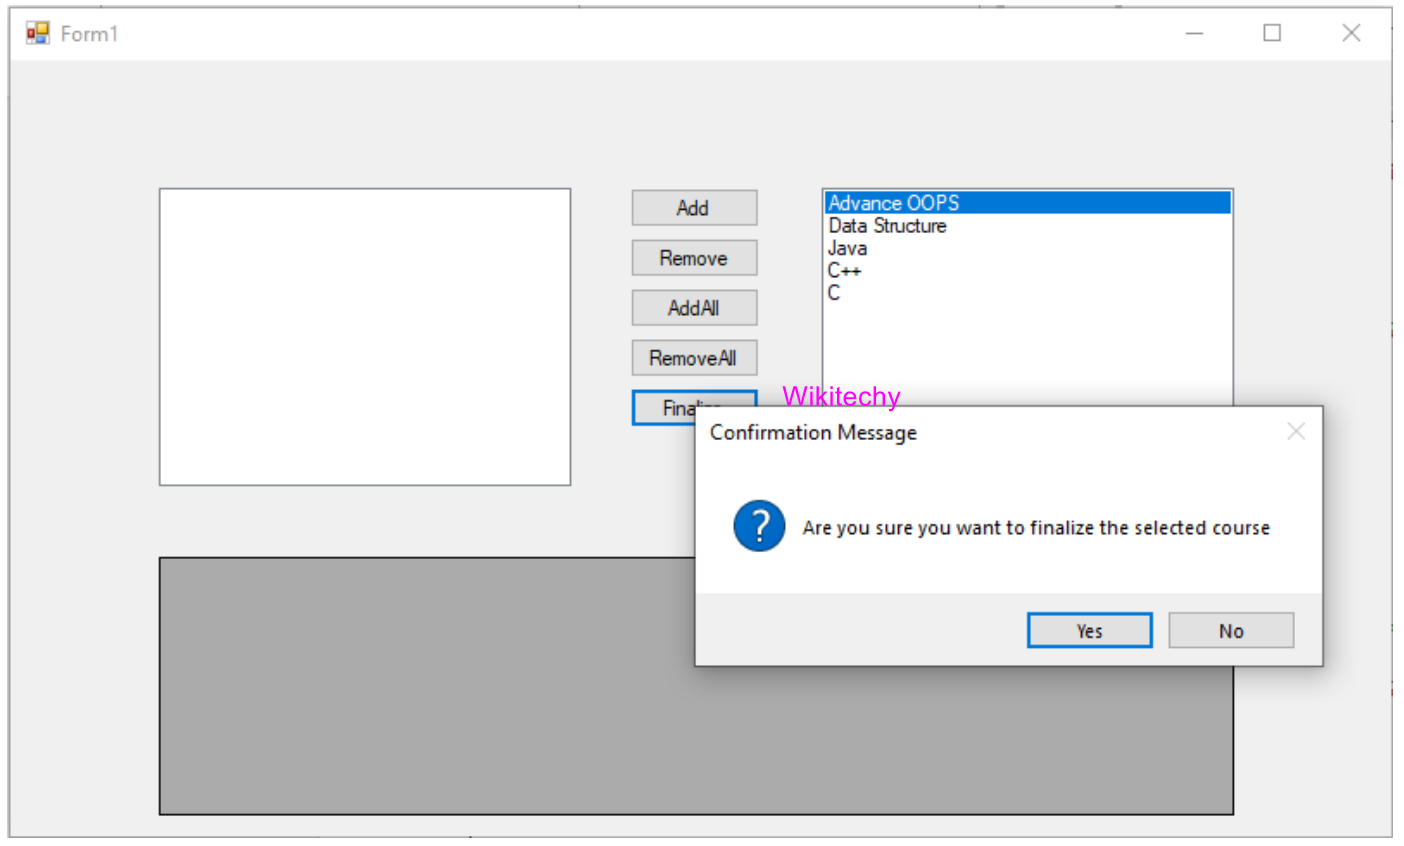
- After clicking on yes, the aggregate data is displayed in the Grid View as shown in the below screenshot.