Maven - Run Maven Java Web Application in Jetty Maven Plugin - maven tutorial
maven tutorial tags : apache maven , maven repository , maven central
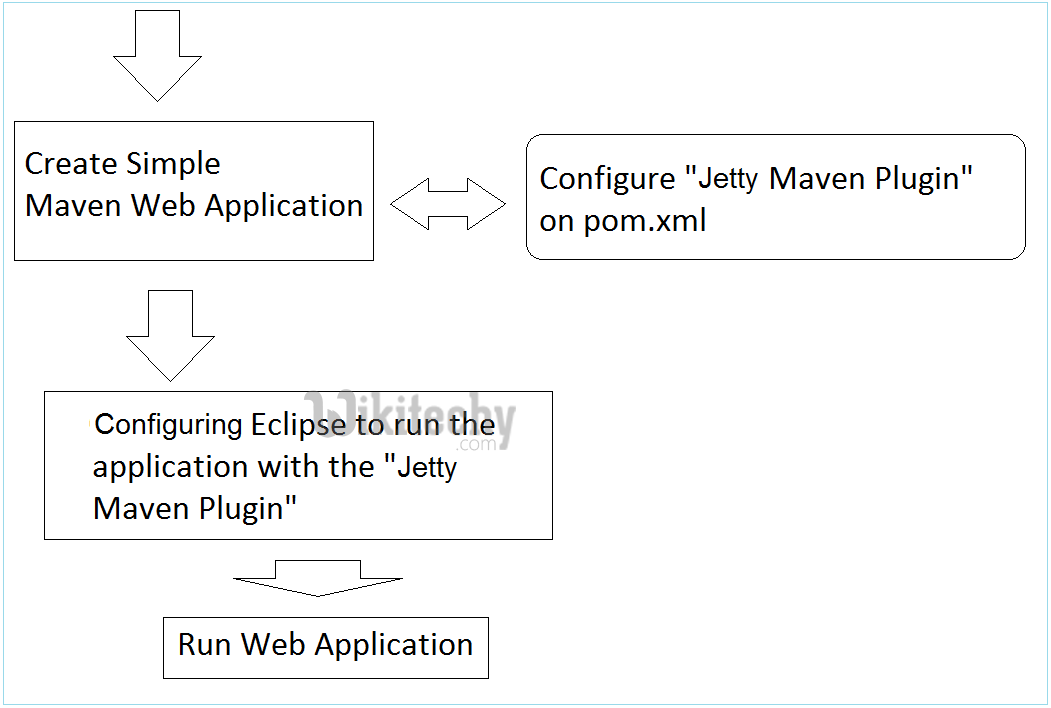
1- Introduction
- This tutorial was written based on:
- Eclipse 4.6 (NEON)
- Jetty Maven Plugin 9.2.x
- The steps in this tutorial:
learn maven tutorial - run maven java web application in jetty maven plugin- maven example
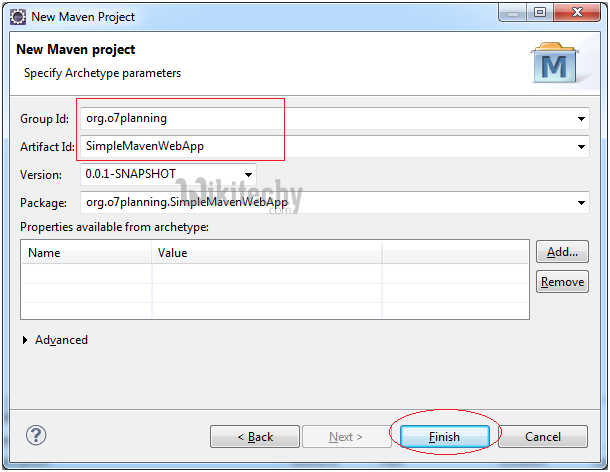
2- Quick create Maven Web Application Project
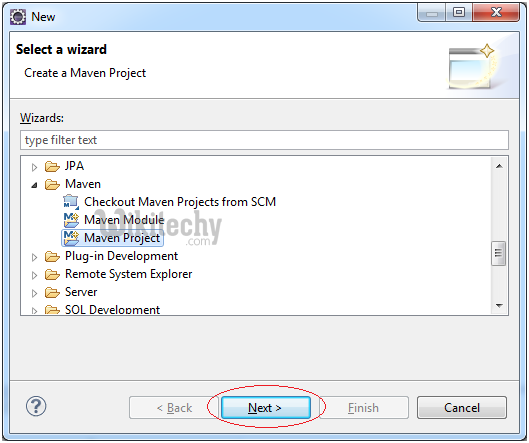
learn maven tutorial - quick create maven web application project step1 - maven example
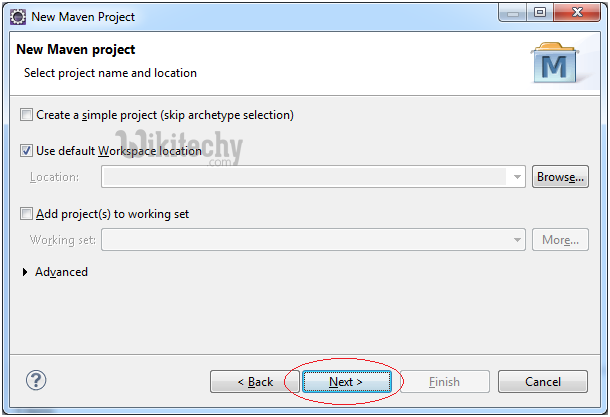
learn maven tutorial - quick create maven web application project step2 - maven example
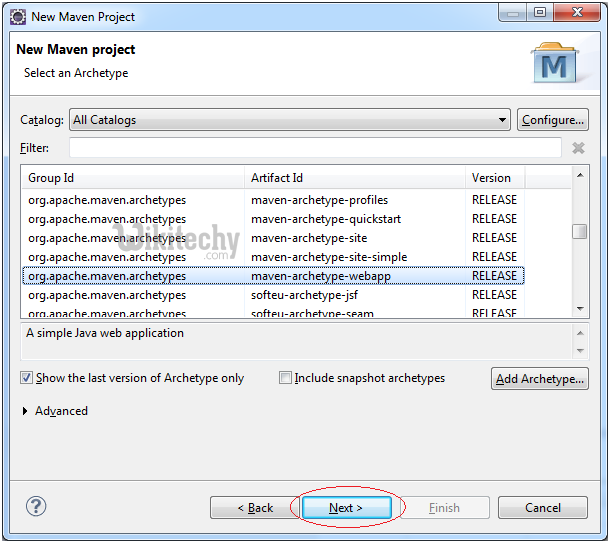
learn maven tutorial - quick create maven web application project step3 - maven example
learn maven tutorial - quick create maven web application project step4 - maven example
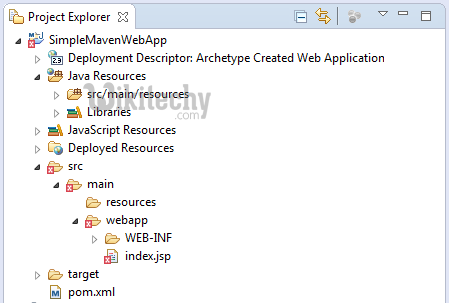
- This is image of project is created.
learn maven tutorial - quick create maven web application project step5 - maven example
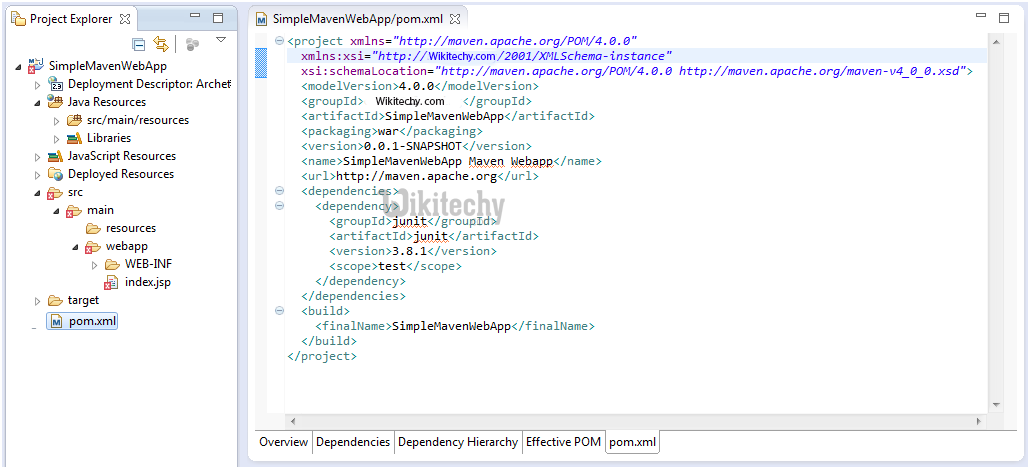
- The contents of the file pom.xml was created:
learn maven tutorial - quick create maven web application project step6 - maven example
- Do not worry about the error message when the Project has been created. The reason is that you do not declare the Servlet library.
- Eclipse 4.4 (Luna) create Maven project structure may be wrong. You need to fix.
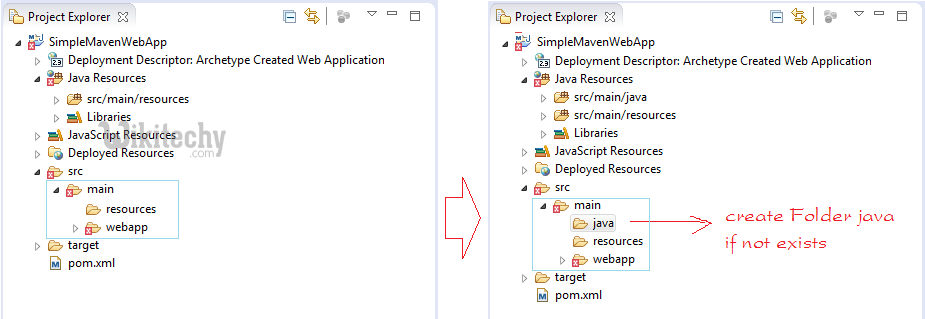
learn maven tutorial - quick create maven web application project step7 - maven example
3- Search Jetty Maven Plugin version to use
- Next we will find a version of "Jetty Maven Plugin" (fit or newest):
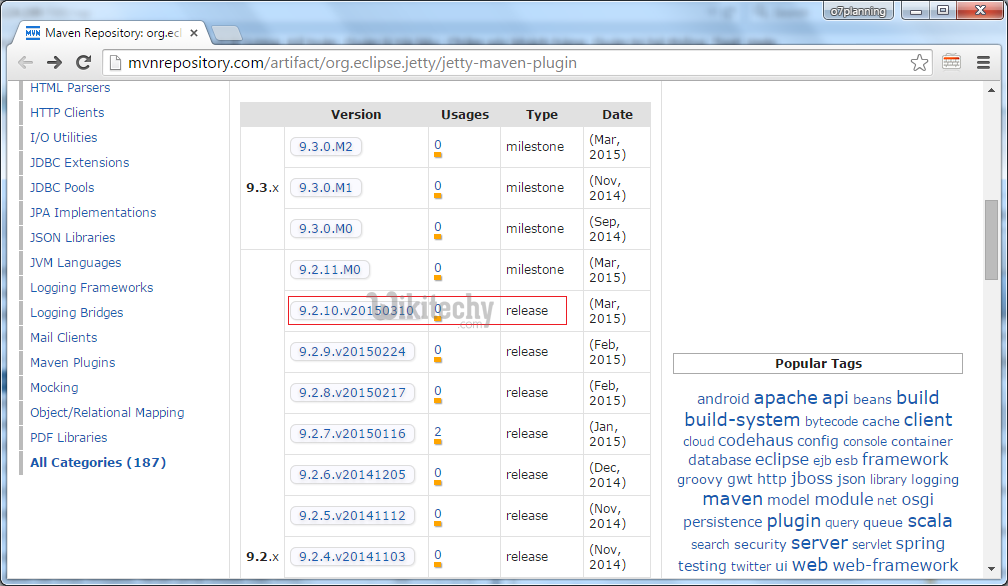
learn maven tutorial -search jetty maven plugin version to use step1- maven example
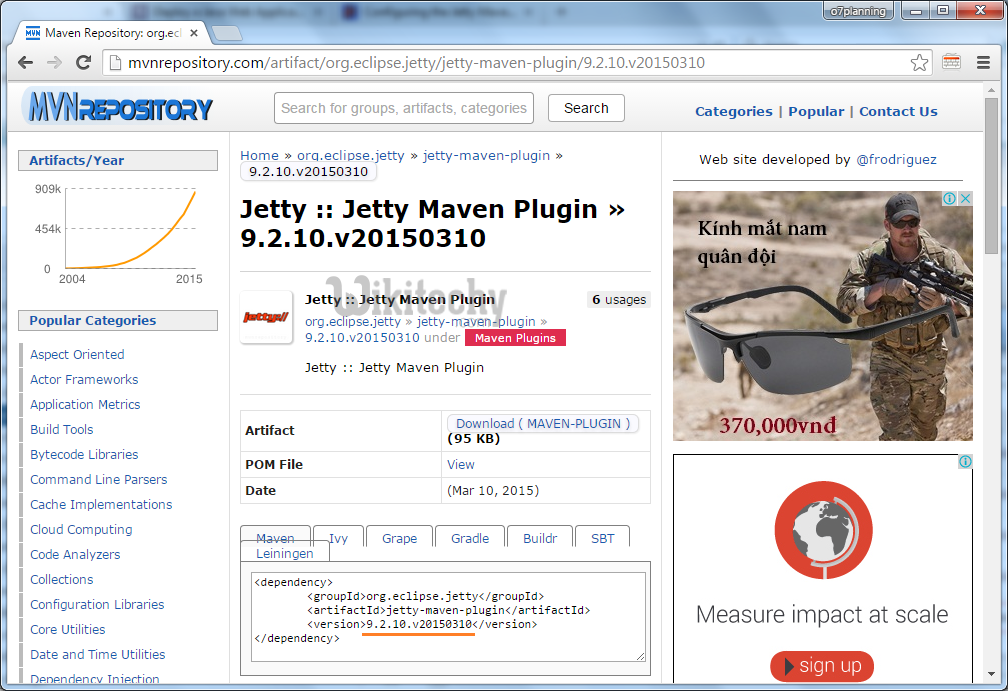
learn maven tutorial -search jetty maven plugin version to use step2- maven example
4- Configure and run Maven Project
- Configure Maven Servlet Library
<!-- Servlet Library -->
<dependency>
   <groupId>javax.servlet</groupId>
   <artifactId>javax.servlet-api</artifactId>
   <version>3.1.0</version>
   <scope>provided</scope>
</dependency>- Copy and paste the following code into pom.xml
<plugins>
    <plugin>
        <groupId>org.eclipse.jetty</groupId>
        <artifactId>jetty-maven-plugin</artifactId>
        <version>9.2.10.v20150310</version>

        <configuration>
            <scanIntervalSeconds>10</scanIntervalSeconds>
            <webApp>
                <contextPath>/SimpleMavenWebApp</contextPath>
            </webApp>
        </configuration>

    </plugin>
</plugins>
pom.xml
<project xmlns="http://maven.apache.org/POM/4.0.0" xmlns:xsi="http://www.wikitechy.com/2001/XMLSchema-instance"
    xsi:schemaLocation="http://maven.apache.org/POM/4.0.0 http://maven.apache.org/maven-v4_0_0.xsd">
    <modelVersion>4.0.0</modelVersion>
    <groupId>wikitechy.com</groupId>
    <artifactId>SimpleMavenWebApp</artifactId>
    <packaging>war</packaging>
    <version>0.0.1-SNAPSHOT</version>
    <name>SimpleMavenWebApp Maven Webapp</name>
    <url>http://maven.apache.org</url>
    <dependencies>

        <dependency>
            <groupId>junit</groupId>
            <artifactId>junit</artifactId>
            <version>3.8.1</version>
            <scope>test</scope>
        </dependency>

        <!-- Servlet Library -->
        <dependency>
            <groupId>javax.servlet</groupId>
            <artifactId>javax.servlet-api</artifactId>
            <version>3.1.0</version>
            <scope>provided</scope>
        </dependency>

    </dependencies>

    <build>
        <finalName>SimpleMavenWebApp</finalName>
        <plugins>

                        <plugin>
                <groupId>org.eclipse.jetty</groupId>
                <artifactId>jetty-maven-plugin</artifactId>
                <version>9.2.10.v20150310</version>

                <configuration>
                    <scanIntervalSeconds>10</scanIntervalSeconds>
                    <webApp>
                        <contextPath>/SimpleMavenWebApp</contextPath>
                    </webApp>
                </configuration>

            </plugin>
        </plugins>
    </build>
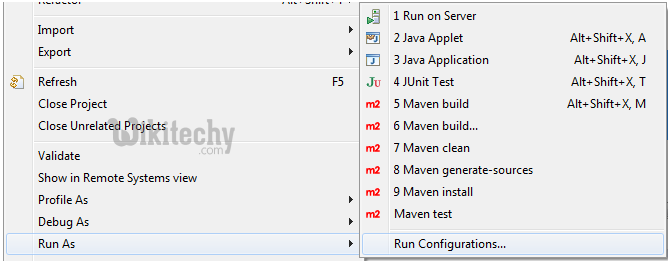
</project>- Configure Project to run. Right-click on the Project and select:
- Run As/Run Configurations...
learn maven tutorial - configure and run maven project step1- maven example
- Create a new run configuration
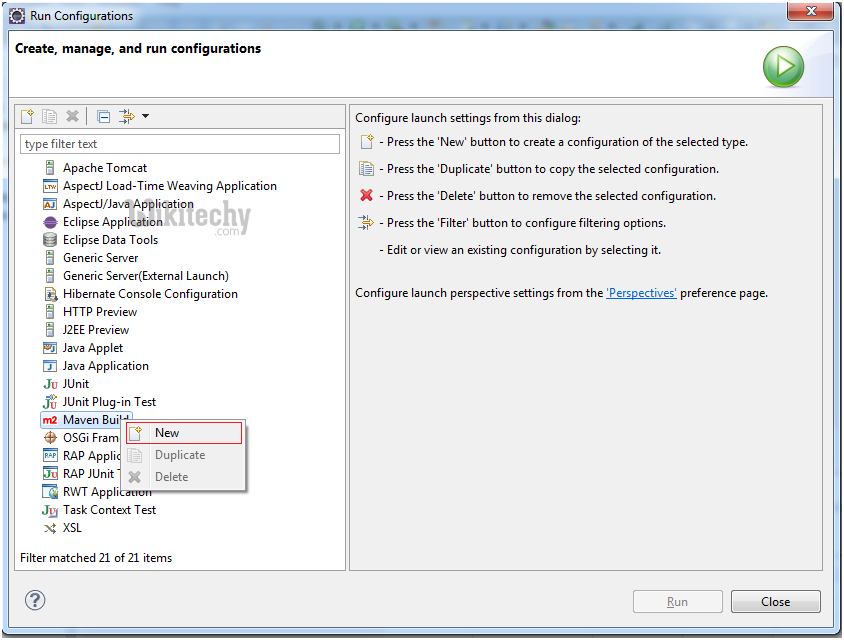
learn maven tutorial - configure and run maven project step2- maven example
- Enter the information as shown below, click Apply and click Run.
- Name: Run SimpleMavenWebApp
- Base directory: ${workspace_loc:/SimpleMavenWebApp}
- Goals: jetty:run
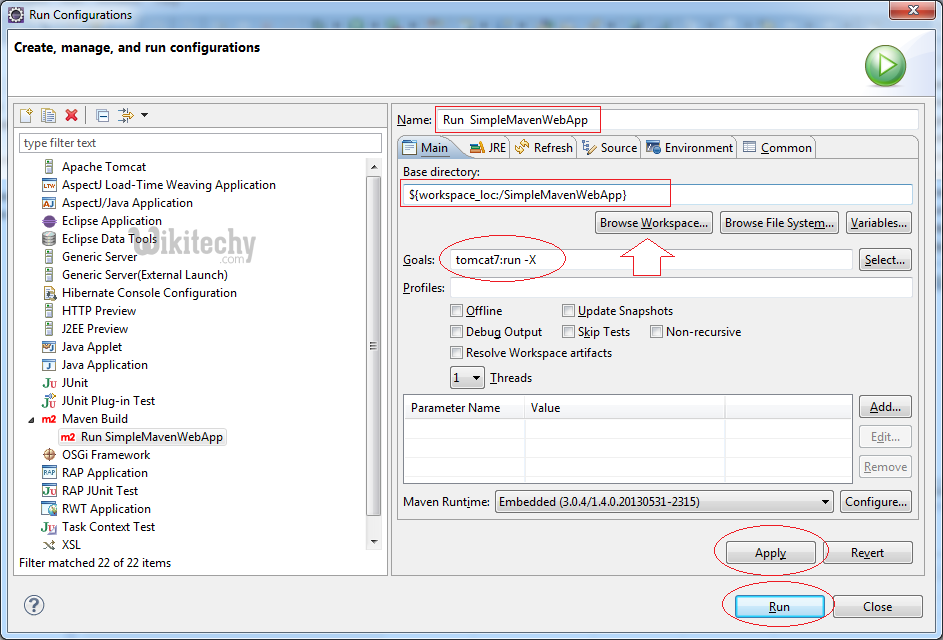
learn maven tutorial - configure and run maven project step3- maven example
- In the first run, Eclipse will download "Jetty Maven Plugin", so you have to wait until the download is completed
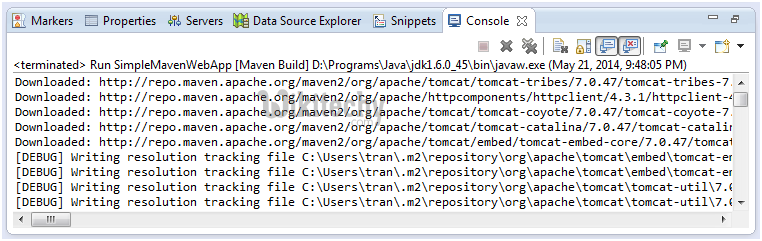
learn maven tutorial - configure and run maven project step4- maven example
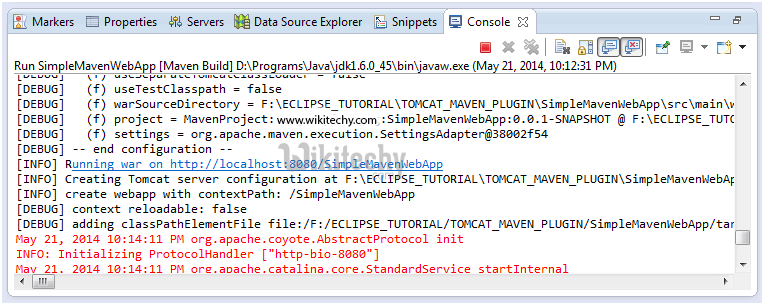
learn maven tutorial - configure and run maven project step5- maven example
- Copy the link below to run on your browser
- http://localhost:8080/SimpleMavenWebApp
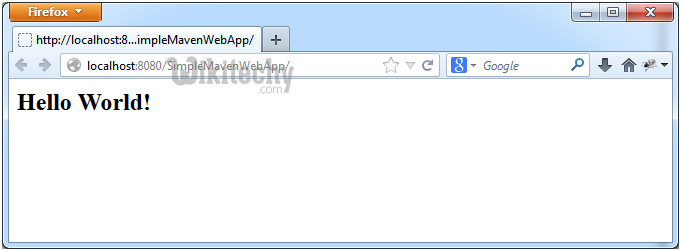
learn maven tutorial - configure and run maven project step6- maven example
- To rerun the Web Application you will need to close the currently running application.
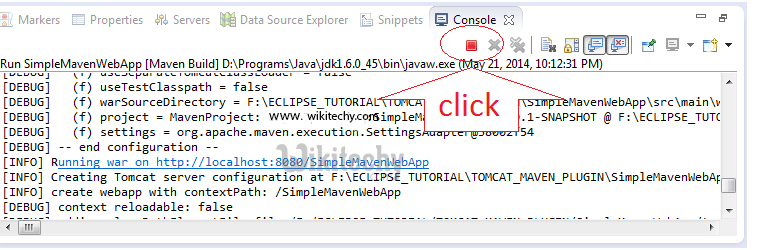
learn maven tutorial - configure and run maven project step7- maven example
- Run the application again
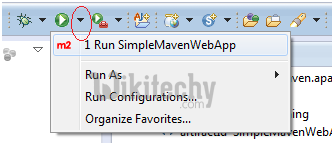
learn maven tutorial - configure and run maven project step8 - maven example