Kivy Tutorial
What is Kivy ?
What is Kivy ?
Read Also
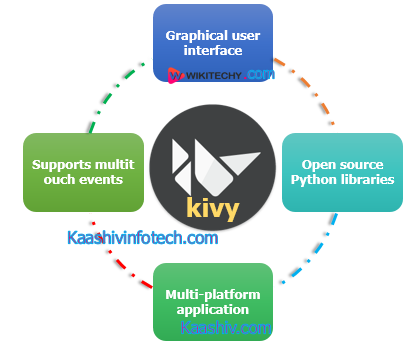
- It also supports multitouch events.
- The applications made using Kivy will similar across all platforms but it also means that the applications fell or look will differ from any native application.
- A graphical library OpenGL ES 2.
- An extensive range of widgets that support multi-touch.
- An intermediate Kivy language to design custom widgets.
- An extensive support for input devices such as a mouse, keyboard, TUIO, as well as OS-specific multi touches events.
- Kivy is an opensource multi-platform GUI development library for Python and can run on iOS, Android, Windows, OS X, and GNU/Linux.
- It helps develop applications that make use of innovative, multi-touch UI.
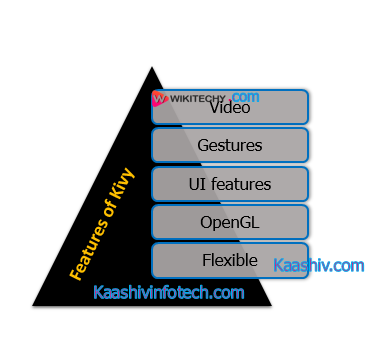
Features of Kivy
There are the following cool features of Kivy
Features of Kivy
1. Video
- Kivy includes various modules to play video files and streams.
- Kivy Video player also supports some common requirements related to videos such as play, pause, stop buttons, text that can be used as a subtitle, display messages to the user on videos, and more.
Example: Pygame video provider supports MPEG1 on Linux.
2. Multi-touch and gestures
- Kivy uses a wide range of widgets that support multi-touch and gestures.
- Kivy developers provide a gesture library to record the user's gesture.
- There are the following three gestures that we can record -
- Left to right horizontal line
- Right to left horizontal line
- Bottom to top vertical line
Read Also
3. UI features
- Kivy comes with a number of widgets and controls to make our mobile interface more attractive and beautiful.
- It is also used to improve one-handed usability, navigate gestures, create new icons or design elements, dark mode, and new animations.
4. Visual effects and OpenGL
- Kivy uses PyGame for easily creating new games.
- PyGame comes with various modules to drawing shapes, dealing with colors, and playing music.
5. Flexible
- Kivy is more flexible because it can run on a variety of devices, including Linux, mobile phones, windows tablets, iOS, and Raspberry .Pi.
- Kivy is flexible so it can adapt to new technologies quickly.
6. Free
- Kivy framework is completely free to use. To work with Kivy you must have 1 GHz 32 bit (x86), or 64 bit (x64) CPU, 1 GB of RAM, 128 MB of graphical memory, and Python installed on your system.
Advantages & Disadvantages of Kivy
Advantages
- A list of advantages of Kivy is given below -
- It helps us to design innovative user interfaces with multi-touch functionalities.
- It can smoothly work with various platforms such as Windows, Android, Linux, iOS, macOS, and Raspberry Pi.
- It helps us to run code on all supported platforms.
- It provides well-documented APIs.
- It offers a better representation of programs, including classes, widget configuration, and inherited classes.
- It performs better than HTML 5.
Disadvantages
- Kivy uses kV language, which is not suitable for us to compile our code alone.
- It is not always up-to-date with the latest Android APIs.
- It takes a lot of time for building and compiling mobile applications.
- The sizes of the package are unnecessarily huge.
- It has a lack of community support.
Architecture of Kivy
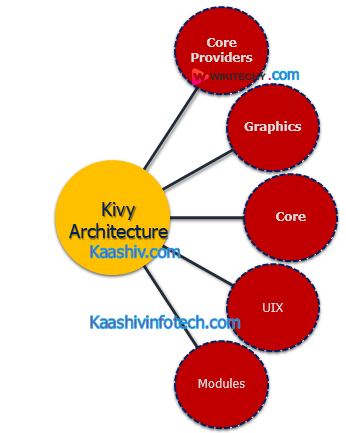
Architecture of Kivy
1. Core Providers and Input Providers
- Kivy Providers mainly abstract the various core tasks includes opening a window, displaying images and text, playing audio, spelling correction, fetching images from a camera, and so on.
- An input provider is a piece of code that helps us to add support for a specific input device such as TUIO, mouse emulator, or Apple's trackpads.
- We can also add support for new input devices by providing a new class that reads our input data from our device and transform them into Kivy events.
2. Graphics
- Kivy Graphics APIs have the ability to automatically optimize the drawing commands.
3. Core
Core provides the following features -
- Clock
- A clock is used to schedule the timer events. Clock supported both one-shot timers and periodic timers.
- Cache
- In Kivy, the cache is used to store python objects. We can control the cache in the following two ways -
- Object limit
- Timeout
4. UIX
The UIX module commonly contains Widgets and Layouts to quickly create a user interface.
- Widgets
- Widgets are the user interface components that we add to our program to provide some kind of functionality.
- Example: file browser, buttons, lists, sliders, and more.
- Layouts
- Layouts are used to arrange widgets.
5. Modules
- Modules are the classes that can be loaded on the Kivy when we start the Kivy application.
- The config file is used to manage the loading of modules.
Kivy Installation on Windows
Step 1
- Copy-paste the following link on any browser or you just simply click on the following link - Python
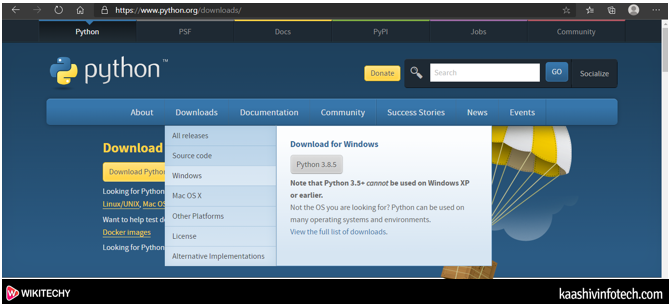
Step 2
- The following page appears on the screen, in which click on the Downloads and select Windows from the drop-down menu.
Step 3
- Select the Python Releases version for windows

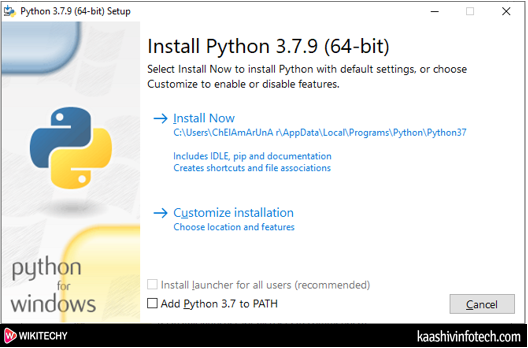
Step 4
- Double click on the downloaded file, the below window appears on the screen in which click on Install Now.
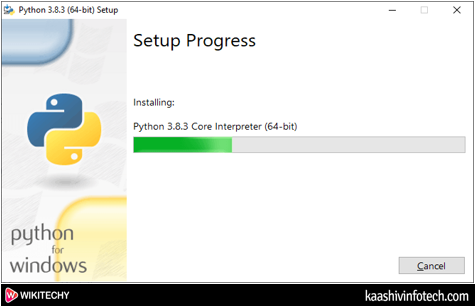
Step 5
- The below screenshot shows that Python installation is in progress.
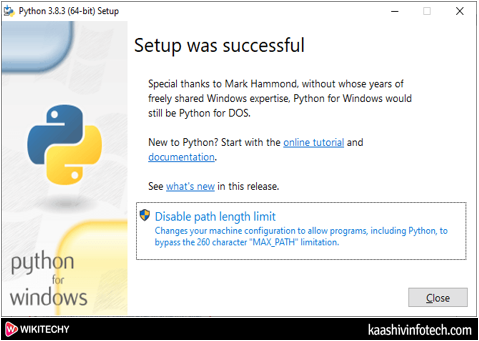
Step 6
- The below screenshot shows that the setup is installed successfully. You just simply click on the Close button.
Follow the Below Steps to Download Anaconda
Step 1
- Click on the below link to install Anaconda
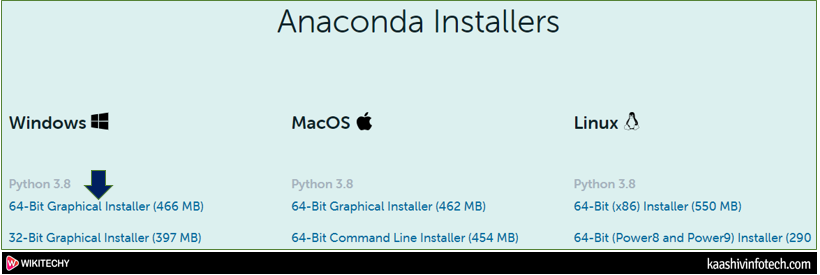
Step 2
- The following page appears on the screen. Scroll down the window and click on 64-bit Graphical Installer (446 MB) at the bottom of the screen.
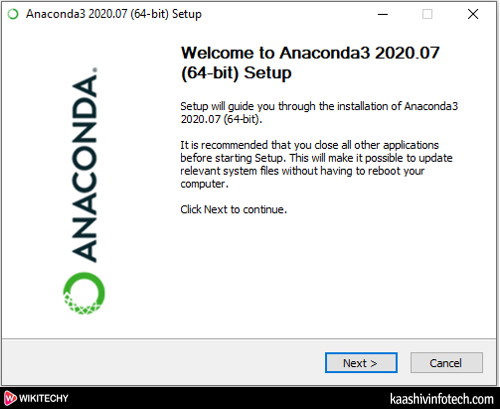
Step 3
- You can see that Anaconda Graphical Installer is to started download. Once the file is downloaded, double click on that executable file. The following window appears on the screen in which click on the Next.
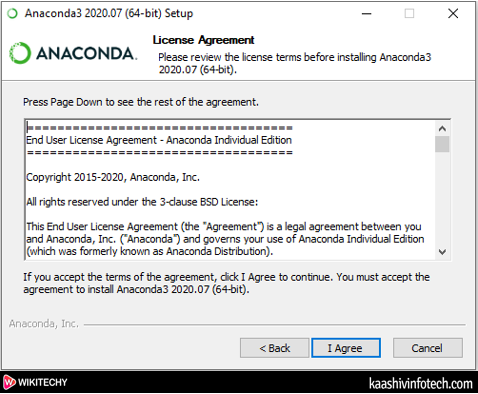
Step 4
- A License Agreement window appears on the screen, in which click on I Agree.
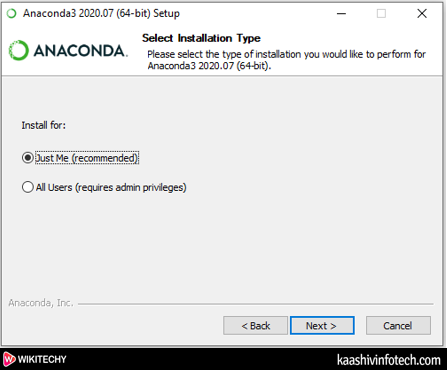
Step 5
- Here choose type of Installation, select Install for Just Me (recommended)
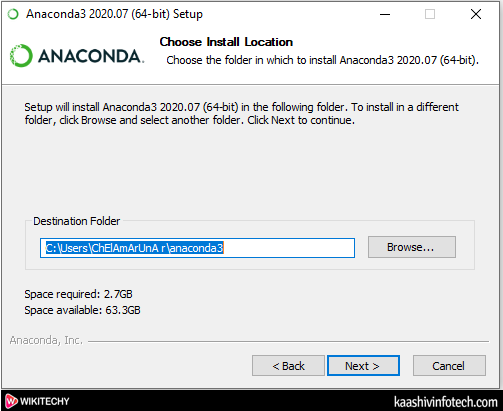
Step 6
- Browse the location where you want to install Anaconda and click on the Next.
Read Also
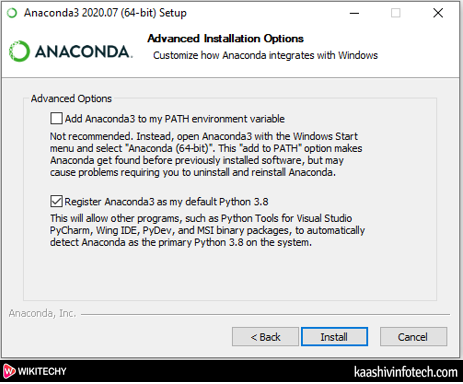
Step 7
- Advanced Installation Options window appears on the screen, tick on Register Anaconda3 as my default Python 3.7. And click on the Install
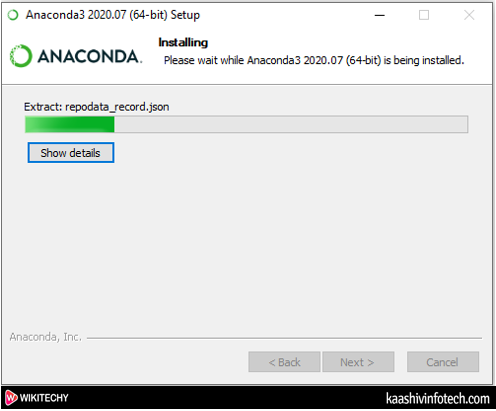
Step 8
- The below screenshot shows that Anaconda Installation is in progress.
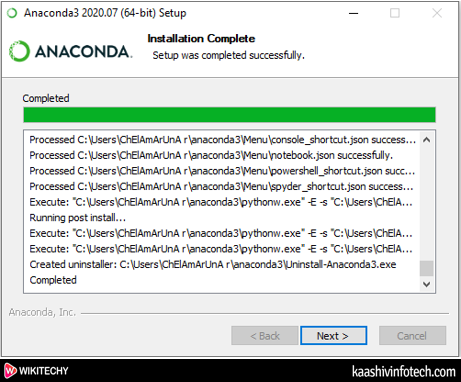
Step 9
- Once the Installation process is completed, click on the Next button.
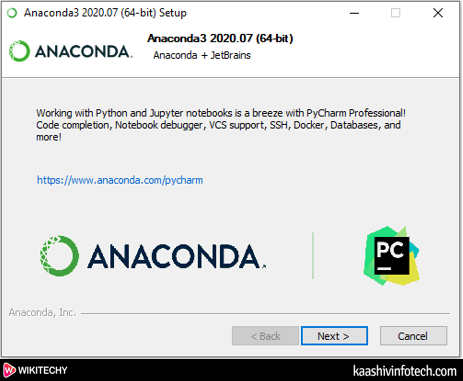
Step 10
- The following window appears on the screen in which click on the Next.
Step 11
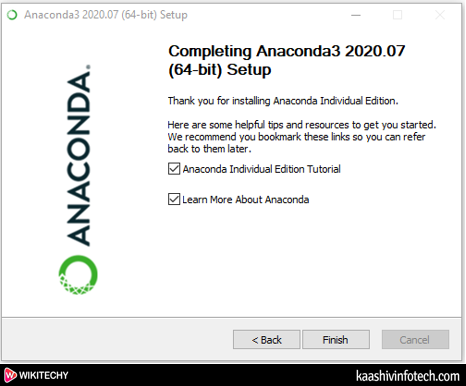
- A completing Anaconda set up window appears on the screen, simply click on the Finish on that window.
Install Kivy
- Once you installed the Anaconda, now we are able to install kivy.
There are the following steps to install kivy -
Step 1
- Go to the Anaconda Prompt.
Step 2
- Before installing kivy, first update the
pipby using the following command.
python -m pip install - -upgrade pip wheel setuptools
Step 3
- Install the Dependencies
- There are the following 3 dependencies that we need to install while installing the Kivy.
Python -m pip install docutils pygments pypiwin32 kivy.deps.sdl2 kivy.deps.glew

python -m pip install kivy.deps.gstreamer

python -m pip install kivy.deps.angle
Step 4
- Use the following command to install Kivy.
python -m pip install kivy
Create a Hello World program in Kivy
There are the following steps to create a Hello World program in Kivy
- Open any text editor (Notepad or Notepad++)
Sample Code
- Write the following code on the Editor.
import kivy
from kivy.app import App
from kivy.uix.label import Label


# Replace this with your
# current version
kivy.require('1.11.1')

# Defining a class
class MyFirstKivyApp(App):

    # Function that returns
    # the root widget
    def build(self):

        # Label with text Hello World is
        # returned as root widget
        return Label(text ="Hello World !")


# Here our class is initialized
# and its run() method is called.
# This initializes and starts
# our Kivy application.
MyFirstKivyApp().run()
Output
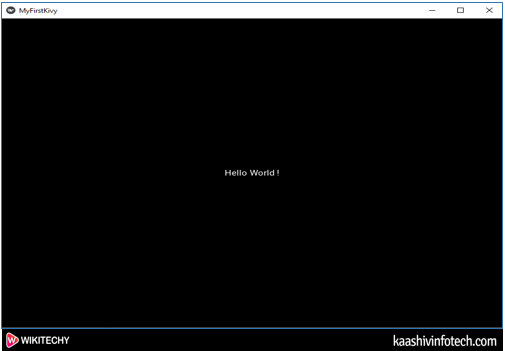
Hello World Program in Kivy
Read Also
Add Image Widget in Kivy
- Kivy image widget uses kivy.uix.image module to display image.
- There are the following two ways to add images in Kivy.
From System
- From system, image widget is used to load images from the system.
- The below code is used to add an image widget in Kivy
# Program to explain how to add image in kivy

# import kivy module
import kivy

# base Class of your App inherits from the App class.
# app:always refers to the instance of your application
from kivy.app import App

# this restrict the kivy version i.e
# below this kivy version you cannot
# use the app or software
kivy.require('1.9.0')

# The Image widget is used to display an image
# this module contain all features of images
from kivy.uix.image import Image

# creating the App class
class MyApp(App):

    # defining build()

    def build(self):

        # return image
        return Image(source ='download.jpg')

# run the App
MyApp().run()
Output:
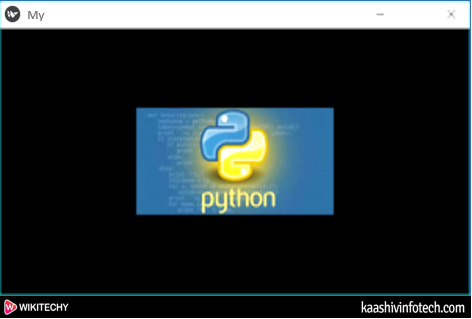
Add Image in Widget
Kivy Buttons
- Buttons are an essential part of every application.
- It performs some specific tasks when we click on the button.
- The main advantage of a button is that it allows users to interact with the software and application directly.
- To create a button in Kivy, we need to import Button form kivy.uix.button.
Sample Code
# import kivy module
import kivy

# this restrict the kivy version i.e
# below this kivy version you cannot
# use the app or software
kivy.require("1.9.1")

# base Class of your App inherits from the App class.
# app:always refers to the instance of your application
from kivy.app import App

# creates the button in kivy
# if not imported shows the error
from kivy.uix.button import Button

# class in which we are creating the button
class ButtonApp(App):

	def build(self):

		btn = Button(text ="Push Me !")
		return btn

# creating the object root for ButtonApp() class
root = ButtonApp()

# run function runs the whole program
# i.e run() method which calls the
# target function passed to the constructor.
root.run()
Output
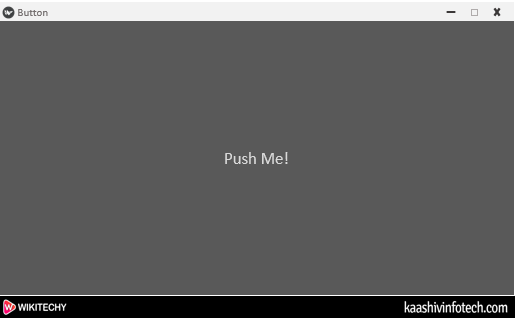
Kivy Button
Read Also
Kivy Widgets
Label Widgets
- Label widget is used for rendering the text. To make labels more attractive, we can add font size, color, and text color in the label.
- To create label, we need to import from kivy.uix.label import Label module
Sample Code
import kivy
from kivy.app import App
from kivy.uix.label import Label  #import Label Module
class Label_Demo(App):
def build(self):
label1 = Label(text ="Wikitechy", font_size = 100) #Disply label on the screen
return label1
root=Label_Demo()
root.run()
Output
- The below screenshot shows the output of the label.
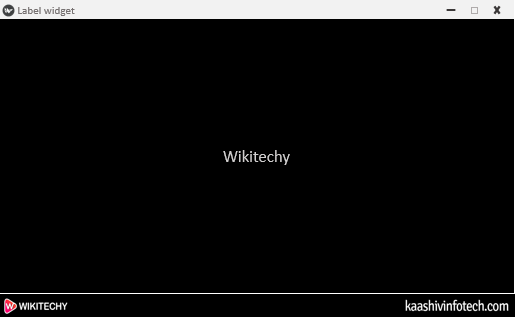
Label Widget
Switch Widget
- Switch widget contains only two states (On or OFF).
- We need to import from kivy.uix.switch import Switch module.
Sample Code
if(switchValue):
        print('Switch is ON:):):)')
    else:
        print('Switch is OFF:(:(:(')


class SwitchApp(App):

     def build(self):

          return SimpleSwitch()


if __name__ == '__main__':
     SwitchApp().run()
Output
- The below screenshot shows the output of the Switch Widget.
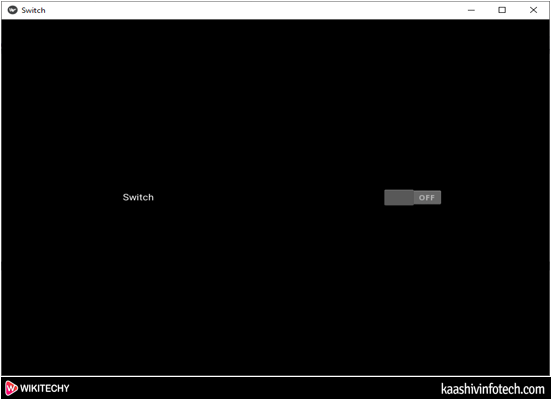
Switch Widget
Progress Bar
- Progress Bar is one of the most important graphical control element, which is used to analyze the progress of operation such as downloading progress, file transfer progress, loading app, saving updates, and installation progress.
Sample Code
import kivy
from kivy.app import App
from kivy.uix.widget import Widget
from kivy.uix.button import Button
from kivy.uix.progressbar import ProgressBar
from kivy.uix.boxlayout import BoxLayout
from kivy.clock import Clock
from time import sleep

class MainMenu(BoxLayout):
    def __init__(self):
        super().__init__()
        self.orientation = 'vertical'

        btn = Button(text="Start")
        btn.bind(on_release=self.trigger)
        self.add_widget(btn)

        self.MyList = ('My', 'first', 'Progress', 'Bar')
        self.i = 0
        self.pb = ProgressBar(max = len(self.MyList), value = 0)
        self.add_widget(self.pb)

    def trigger(self, *args):
      self.i = 0
      self.pb.value = 0

      Clock.schedule_interval(self.heavyFunc,0.1)

    def heavyFunc(self, dt):
        sleep(0.5)
        print(self.MyList[self.i])
        self.i += 1
        self.pb.value +=1
        if self.i >= len(self.MyList):
            Clock.unschedule(self.heavyFunc)
            print('unscheduled')

class TestApp(App):
    def build(self):
        return MainMenu()

root = TestApp()
root.run()
Read Also
Output
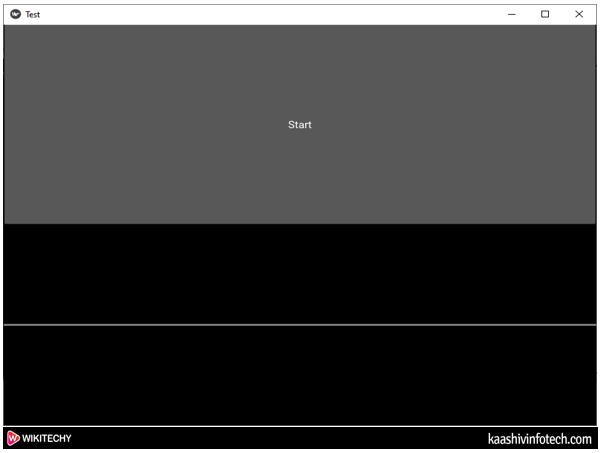
- When we click on the Start, the below progress bar appears on the screen.
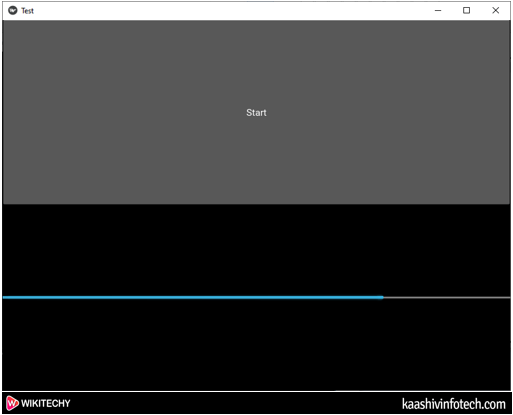
Progress Bar
Kivy Layouts
- Layout is the most important term in graphics design.
- It is used to arrange elements for a better look.
- There are the following different types of layout that we generally use in the Kivy.
- GridLayout
- BoxLayout
- FloatLayout
- AnchorLayout
- StackLayout
1. GridLayout
- GridLayout is designed to arrange the components in the form of a rectangular grid. In GridLayout, every rectangular grid is exactly the same in size.
Sample Code
import kivy  #import kivy
from kivy.app import App
from kivy.uix.button import Button
from kivy.uix.gridlayout import GridLayout #import GridLayout
class Grid_LayoutApp(App):
    def build(self):
        layout = GridLayout(cols = 3) #define number of columns

        layout.add_widget(Button(text = 'wiki')) #first row
        layout.add_widget(Button(text = 'techy'))
        layout.add_widget(Button(text = '.com'))

        layout.add_widget(Button(text = 'Python')) #second row
        layout.add_widget(Button(text = '+'))
        layout.add_widget(Button(text = 'Kivy'))

        return layout

root = Grid_LayoutApp()

root.run()
Output
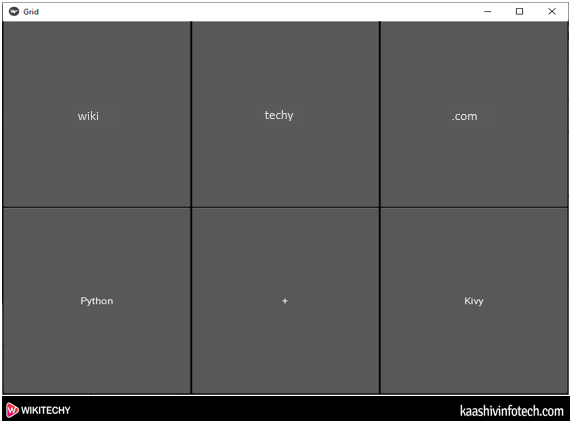
GridLayout
2. BoxLayout
- BoxLayout is used to arrange the component based on the axis's [along X-axis (horizontally) and along Y-axis (Vertically)].
Sample Code
import kivy
from kivy.app import App
from kivy.uix.boxlayout import BoxLayout
from kivy.uix.button import Button

class Box_LayoutApp(App):

    def build(self):

        superBox        = BoxLayout(orientation='vertical')

        horizontalBox   = BoxLayout(orientation='horizontal')

        button1         = Button(text = "Python")

        button2         = Button(text = "Pygame")

        horizontalBox.add_widget(button1)

        horizontalBox.add_widget(button2)

        verticalBox     = BoxLayout(orientation = 'vertical')

        button3         = Button(text = "Jupyter")

        button4         = Button(text = "OpenGL")

        verticalBox.add_widget(button3)

        verticalBox.add_widget(button4)

        button1         = Button(text = "Kivy")

        horizontalBox.add_widget(button1)

        superBox.add_widget(horizontalBox)

        superBox.add_widget(verticalBox)

        return superBox

root= Box_LayoutApp()
root.run()
Output
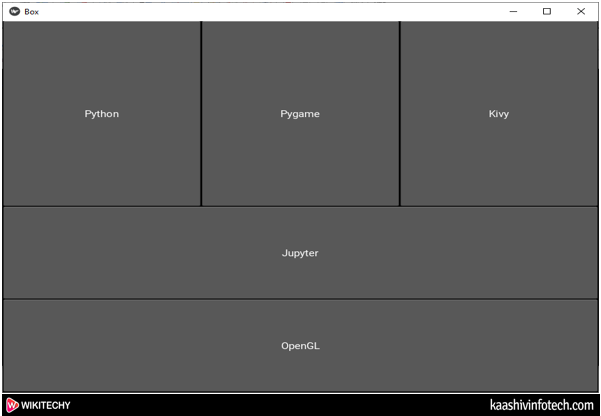
BoxLayout
Read Also
3. FloatLayout
- FloatLayout is used to place element according to the size of the current window (in terms of height and width of window).
- FloatLayout contains pos_hint and size_hint, which are the properties of its children.
Sample Code
import kivy
from kivy.app import App
from kivy.uix.button import Button
from kivy.uix.floatlayout import FloatLayout # import FloatLayout
class Float_LayoutApp(App):

    def build(self):


        Layout = FloatLayout(size = (300,300))
        btn = Button(text ='Kivy',
        size_hint = (.3, .5),
        background_color = (.6, .7, .7, 1),
        pos_hint = {'x':.4, 'y':.3 })


        Layout.add_widget(btn)


        return Layout

root=Float_LayoutApp()
root.run()
Output
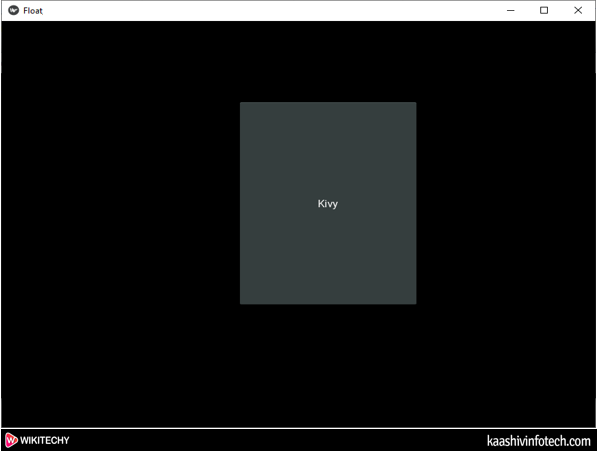
FloatLayout
4. AnchorLayout
- AnchorLayout is used to align the border top, bottom, left, right, or center.
- AnchorLayout is initialized using the below parameters:
- anchor_x = (Parameter can be passed: "left", "right", and "center")
- anchor_y = (Parameter can be passed: "top", "bottom", and "center")
Sample Code
import kivy
from kivy.app import App
from kivy.uix.anchorlayout import AnchorLayout  # import AnchorLayout
from kivy.uix.boxlayout import BoxLayout
from kivy.uix.button import Button

class Anchor_LayoutDemo(App):

    def build(self):

        # Anchor1 (anchor_x = Left, anchor_y = center)

        anchorLayout1 = AnchorLayout(anchor_x = 'left', anchor_y = 'center')

        button1       = Button(text ='Python', size_hint = (0.4, 0.4),
                               background_color = (.7,1.0,.7,1))

        anchorLayout1.add_widget(button1)

        # Anchor2 (anchor_x = center, anchor_y = top)

        anchorLayout2    = AnchorLayout()

        anchorLayout2 = AnchorLayout(anchor_x = 'center', anchor_y = 'top')

        button2       = Button(text = 'Kivy', size_hint = (0.2, 0.2),
                               background_color = (.7,1.0,.7,1))

        anchorLayout2.add_widget(button2)


        # Anchor3 (anchor_x = right anchor_y = center)

        anchorLayout3    = AnchorLayout()

        anchorLayout3 = AnchorLayout(anchor_x = 'right', anchor_y = 'center')

        button3       = Button(text = 'OpenGL', size_hint = (0.4, 0.4),
                               background_color = (.7,1.0,.8,1))

        anchorLayout3.add_widget(button3)

        boxLayout = BoxLayout() # crete boxLayout

        # Add the anchor layouts to the box layout

        boxLayout.add_widget(anchorLayout1)

        boxLayout.add_widget(anchorLayout2)

        boxLayout.add_widget(anchorLayout3)

        return boxLayout

root = Anchor_LayoutDemo()
root.run()
Output
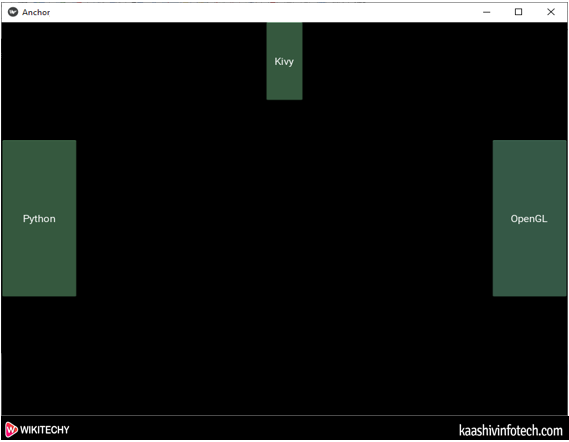
Anchor Layout
5. StackLayout
- StackLayout helps us to arrange buttons vertically and horizontally. In StackLayout, it is not compulsory that the sizes of all buttons are the same, so we can arrange buttons according to our requirement.
Sample Code
import kivy
kivy.require("1.9.1")
from kivy.app import App
from kivy.uix.button import Button
from kivy.uix.stacklayout import StackLayout

class StackLayout_Demo(App):

    def build(self):

        SL = StackLayout(orientation ='lr-tb') # Different orientation ['lr-tb', 'tb-lr', 'rl-tb', 'tb-rl', 'lr-bt', 'bt-lr', 'rl-bt', 'bt-rl']


        button1 = Button(text ="1",
                      font_size = 18,
                      size_hint =(.1, .1))
        button2 = Button(text ="2",
                      font_size = 18,
                      size_hint =(.1, .1))
        button3 = Button(text ="3",
                      font_size = 18,
                      size_hint =(.1, .1))
        button4 = Button(text ="4",
                      font_size = 18,
                      size_hint =(.1, .1))
        button5 = Button(text ="5",
                      font_size = 18,
                      size_hint =(.1, .1))
        button6 = Button(text ="6",
                      font_size = 18,
                      size_hint =(.1, .1))
        button7 = Button(text ="7",
                      font_size = 18,
                      size_hint =(.1, .1))
        button8 = Button(text ="8",
                      font_size = 18,
                      size_hint =(.1, .1))
        button9 = Button(text ="9",
                      font_size = 18,
                      size_hint =(.1, .1))
        button0 = Button(text ="0",
                      font_size = 18,
                      size_hint =(.1, .1))

        button11 = Button(text ="11",
                      font_size = 18,
                      size_hint =(.1, .1))
        # adding widgets
        SL.add_widget(button1)
        SL.add_widget(button2)
        SL.add_widget(button3)
        SL.add_widget(button4)
        SL.add_widget(button5)
        SL.add_widget(button6)
        SL.add_widget(button7)
        SL.add_widget(button8)
        SL.add_widget(button9)
        SL.add_widget(button0)

        return SL
root = StackLayout_Demo()
root.run()
Output
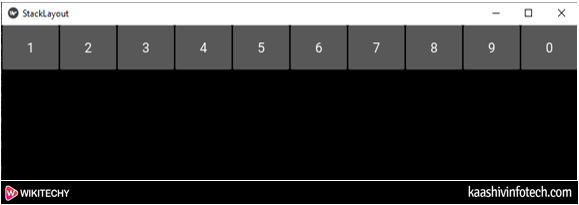
StackLayout
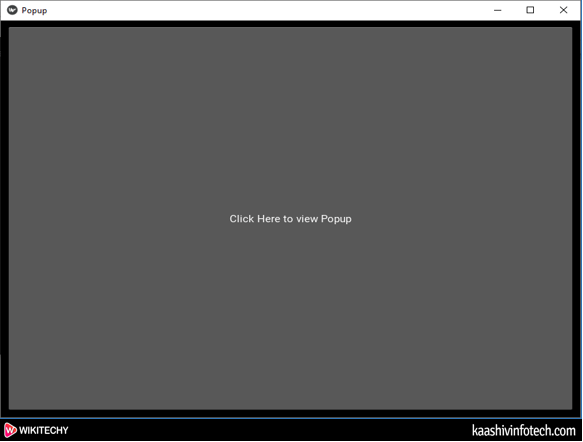
Create a Popup Window in Kivy
- Popup window is a type of window that suddenly pops up on the screen. A popup window appears to users when they visit a page or closes a window.
Sample Code
import kivy
from kivy.app import App
from kivy.uix.button import Button
from kivy.uix.label import Label
from kivy.uix.popup import Popup
from kivy.uix.gridlayout import GridLayout

class Popup_Demo(App):

    def build(self):

        layout = GridLayout(cols = 1, padding = 10)

        self.button = Button(text="Click Here to view Popup",
                             size_hint = (0.8, 0.2),
                             pos_hint = {"x":0.1, "y":0.1})

        layout.add_widget(self.button)

        self.button.bind(on_press = self.onButtonPress)

        return layout

    def onButtonPress(self, button):

        layout      = GridLayout(cols = 1, padding = 10)

        popupLabel  = Label(text  = "Welcome User")

        closeButton = Button(text = "Close the pop-up window")

        layout.add_widget(popupLabel)

        layout.add_widget(closeButton)

        popup = Popup(title = 'Demo Popup',

                      content = layout)


        popup.open()

        closeButton.bind(on_press = popup.dismiss)

root = Popup_Demo()
root.run()
Output
- The below screenshot shows the output of popup window.
Read Also
- When we click on the popup window, the following screen appears on the screen.
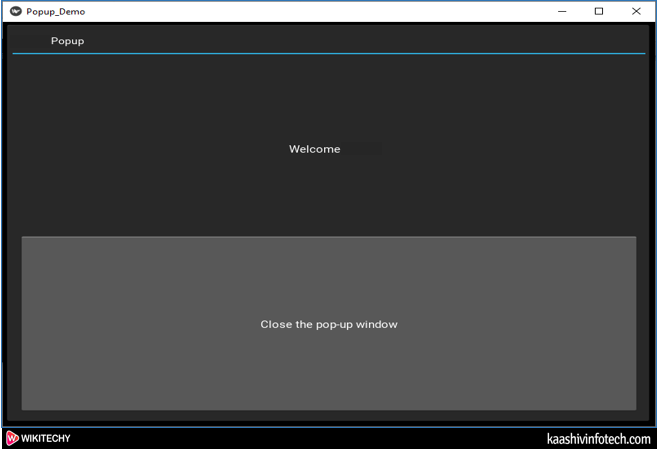
Create Popup Window
Create a Sign in Window in Kivy
- We are going to create a simple sign in page using Kivy. To create a sign in page in kivy, we need to create the following two files -
Sample Code
.py file
import kivy
from kivy.app import App
from kivy.uix.boxlayout import BoxLayout

class SigninWindow(BoxLayout):

    def __init__(self, **kwargs):
        super().__init__(**kwargs)

    def validate_user(self):
        user = self.ids.username_field
        pwd = self.ids.pwd_field
        info = self.ids.info

        uname = user.text
        passwd = pwd.text

        if uname == '' or passwd == '':
            info.text = '[color=#FF0000]username and password are required[/color]'
        else:
            if uname == 'admin' and passwd == 'admin':
                info.text = '[color=#00FF00]Logged In successfully!!![/color]'
            else:
                info.text = '[color=#FF0000]Invalid Username and Password[/color]'


class SigninApp(App):
    def build(self):
        return SigninWindow()


root = SigninApp()
root.run()
.kv file
<FlatButton@ButtonBehavior+Label>:
    font_sixe: 16
<SigninWindow>:
    id: main_win
    orientation: "vertical"
    spacing: 10
    space_x: self.size[0]/3
    canvas.before:
        Color:
            rgba: (255, 255, 255, 255)
        Rectangle:
            size: self.size
            pos: self.pos

    BoxLayout:
        size_hint_y: None
        height: 100
        canvas.before:
            Color:
                rgba: (128, 0, 0, 1)
            Rectangle:
                size: self.size
                pos: self.pos
        Label:
            text: "Login Page"
            bold: True
            size_hint_x: .9
            FlatButton:
                text: "x"
                size_hint_x: .1

    BoxLayout:
        orientation: 'vertical'
        padding: main_win.space_x, 10
        spacing: 20
        size_hint_y: None
        height: 500
        BoxLayout:
            orientation: "vertical"
            spacing: 10
            size_hint_y: None
            height: 80
            Label
                id: info
                text: ''
                markup: True
            TextInput:
                id: username_field
                hint_text: "Username"
                multiline: False
                focus: True
                on_text_validate: pwd_field.focus= True
                size_hint_y: None
                height: 30

            TextInput:
                id: pwd_field
                hint_text: "Password"
                multiline: False
                password: True #for * pattern password
                on_text_validate: root.validate_user()
                size_hint_y: None
                height: 30
        Label:
            id: sp
            size_hint_y: None
            height: 20
        Button:
            text: "Sign In"
            size_hint_y: None
            height: 40
            background_color: (.06,.06,.06,1)
            background_normal: ''
            on_release: root.validate_user()
        Label:
            id: sp2
Read Also
Output
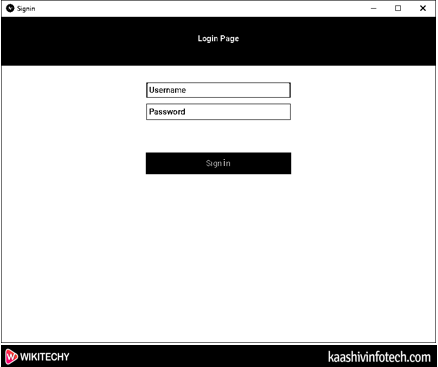
Case 1: If the username and the password are empty, then the following screen appears on the screen.
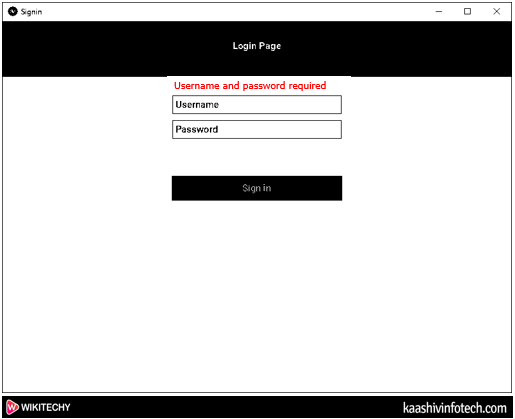
Create Signin Window
Case 2: If we enter username admin and password is admin then the following screen appears on the screen.
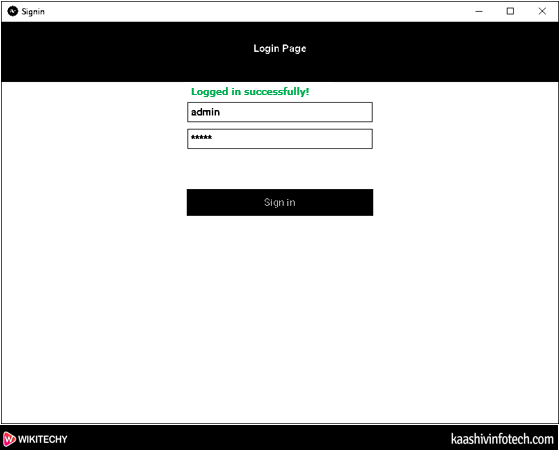
Create Signin Window