
Changing page margins in Google Docs can make your document more readable and well-structured. Whether you’re adjusting margins for printing, formatting, or eliminating awkward page breaks, Google Docs provides multiple ways to do it.
In this guide, we’ll walk you through how to change margins in Google Docs using different methods, including Google Docs page setup and the ruler tool. Let’s dive in! 
 Key Highlights
 Quick steps to change margins in Google Docs
Multiple methods explained: Page setup & ruler tool
Special instructions for iPhone users 
Tips to optimize document formatting
FAQs to answer common queries
 How to Change Margins in Google Docs Using Page Setup
This is the easiest method to adjust the margins in Google Docs. Here’s how you can do it:
 Open Google Docs: Visit Google Docs and open your document.
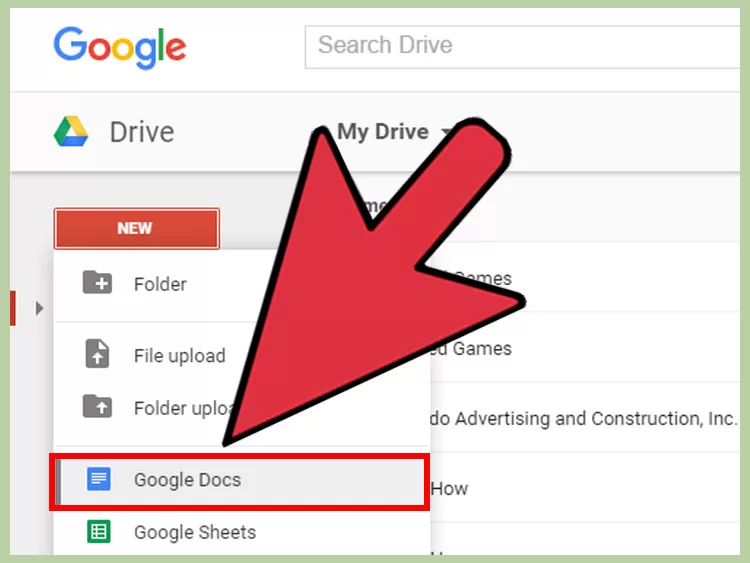
 Go to Page Setup: Click on File > Page setup.
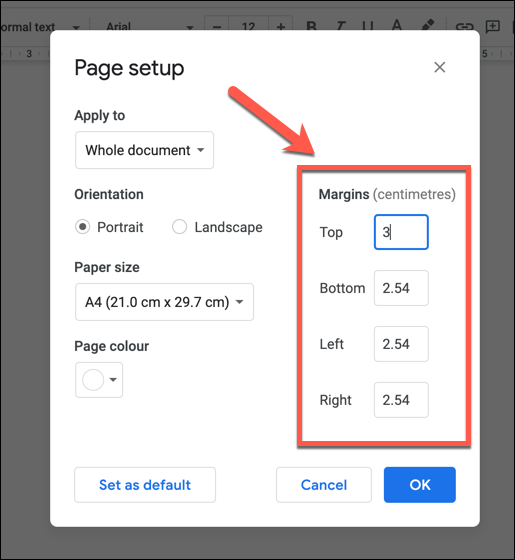
 Enter Margin Values: Adjust the margins for Top, Bottom, Left, and Right.
 Click OK: Save your changes.
 (Optional) Set as Default: If you want to apply the same margins for all future documents, click Set as default.
 Example: Setting 2-inch margins gives you more white space for notes or printing purposes.
 Pro Tip: Use a wider left margin if you plan to bind your document!
 How to Change Margins in Google Docs Using the Ruler
If you need precise control over margins, the ruler tool is your best option. This method is perfect for quick adjustments without guessing the correct margin size.
Steps to Adjust Margins Using the Ruler:
Open your document in Google Docs.
Enable the ruler: If it’s not visible, go to View > Show ruler.

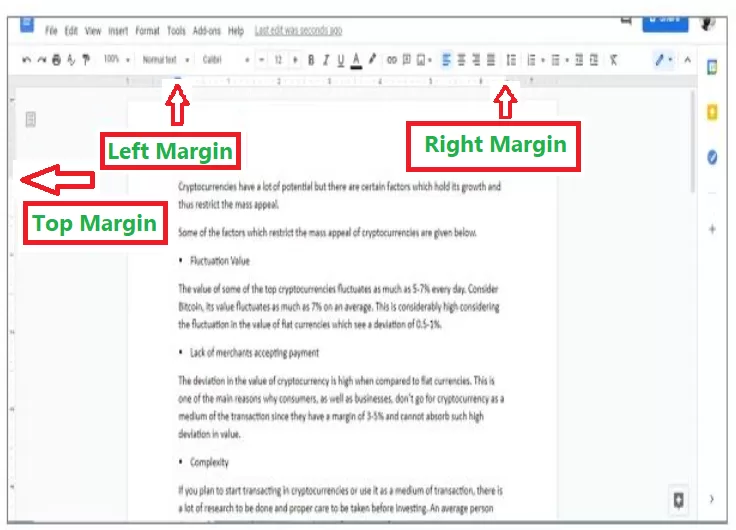
Adjust left/right margins:
- Look at the horizontal ruler at the top.
- Drag the small triangle markers to adjust the margins.
Adjust top/bottom margins:
- Hover over the vertical ruler on the left.
- Drag it up or down to modify the page height.
Why use the ruler? You get a real-time preview of your changes, unlike the Page Setup method!
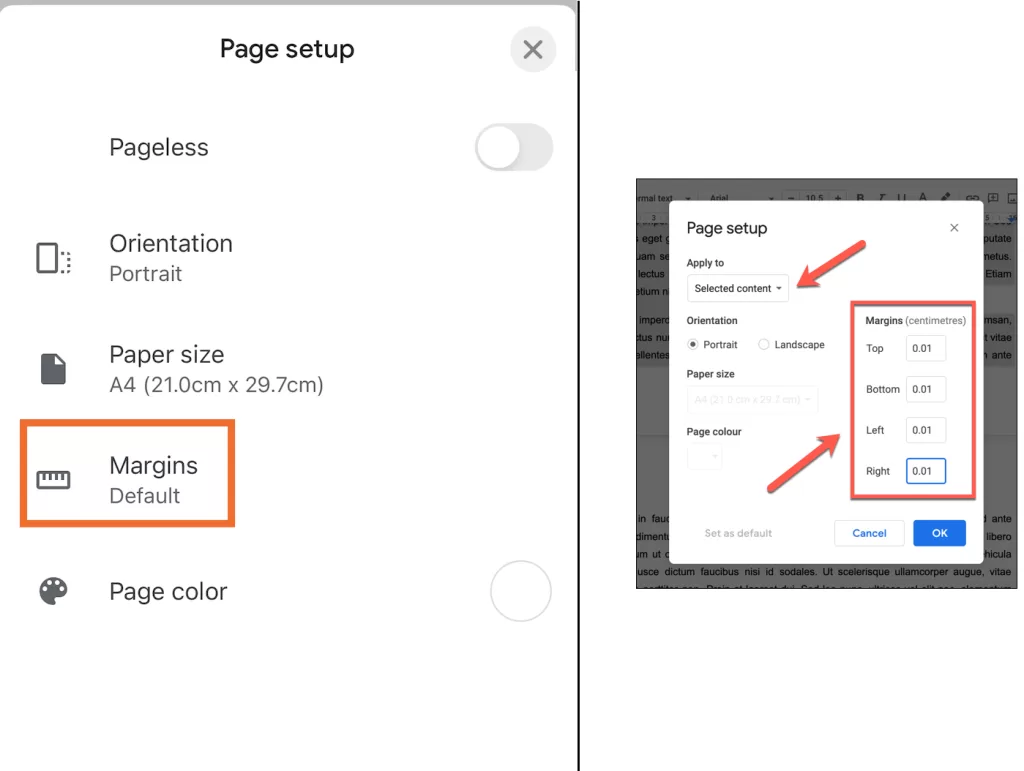
How to Change Margins in Google Docs on Mobile (iPhone Only)
Currently, Google Docs allows only iPhone users to customize margins directly. If you’re using an Android device, your best option is to switch to pageless mode (no page breaks).
Steps for iPhone Users:
Open Google Docs App on your iPhone.
Tap More Options (Three dots …).
Go to Page Setup > Margins.
Select margin type:
- Narrow
- Wide
- Custom (manually enter values)
Save your changes.
Alternative for Android Users: Enable Pageless Mode to remove page breaks (File > Page Setup > Pageless).
Why Adjusting Margins in Google Docs Matters
Better Formatting: Proper margins make documents easier to read  . Print Optimization: Adjust margins for better print alignment
  . Professional Look: Well-structured margins improve document presentation
  .
.
 Related Resources:
 Frequently Asked Questions (FAQs)
What is the default margin size in Google Docs?
By default, Google Docs sets margins to 1 inch on all sides.
How do I reset margins to default?
Go to File > Page Setup > Click Set as Default.
Can I set different margins for different pages?
Currently, Google Docs applies margins to the entire document. However, you can use section breaks for different formatting.
Why can’t I see the ruler in Google Docs?
Make sure the ruler is enabled by going to View > Show Ruler.
How do I remove margins completely?
Enable Pageless Mode (File > Page Setup > Pageless).
Final Thoughts
Now you know how to change margins in Google Docs using multiple methods! Whether you use Page Setup, the ruler tool, or mobile settings, adjusting margins will enhance your document’s readability and printability. Bonus Tip: Margins aren’t just for documents—they’re essential in web design too! If you’re curious about how margins work in CSS, check out these resources:
 CSS Margin Guide by Wikitechy – Learn how margins shape web layouts.
 Margin vs. Padding in CSS – Understand the key differences in spacing.
Need more Google Docs tips? Check out our latest guides on optimizing your documents!

